


How to grow Campanula
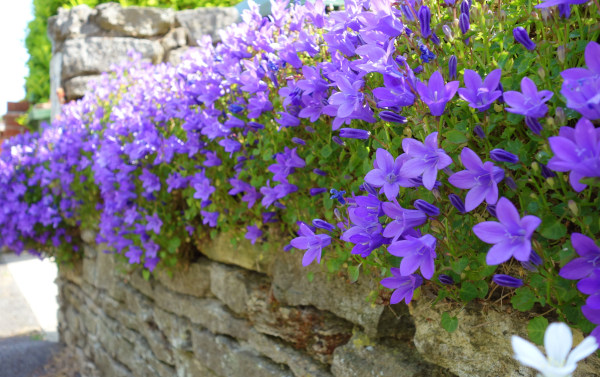
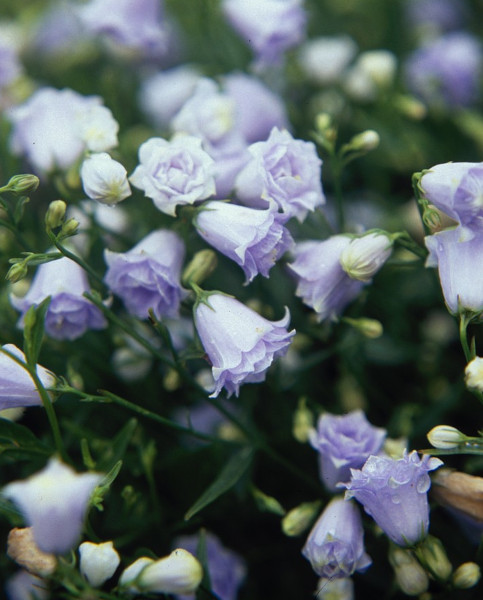
Campanula is a diverse and varied genus, grown for its robust and undemanding nature, and attractive, often blue-purple flowers produced over an impressively long period. From low-growing and spreading to bushy and upright, there is a campanula to suit almost any garden situation.
Hundreds of different species occur naturally throughout the northern hemisphere, in habitats ranging from alpine rock crevices to meadows and woodland. It’s therefore worth taking a little time to find the right species for your needs; a task which our table below should help with.
Campanula can also be known by common names including bellflower, harebell, and Canterbury bells.
Key Information
Soil pH

Position
Hardiness

Where & when to plant Campanula
For best results, plant border species in autumn or spring. An autumn planting can be done by those gardening in mild conditions (and broadly speaking, this is the southern half of the UK). For those liable to cold winters, it is best to wait until spring (generally the northern half of the UK). Planting can also be carried out in summer, though be prepared to water regularly.
Rock garden species are so averse to winter wet it’s best to plant these out in spring. This gives them a full growing season’s worth of root growth to help deal with winter rain. Aim to plant these in mid to late April when the worst of the heavy frosts are behind you.
When it comes to choosing a spot, the small rock garden species are especially lovely when raised closer to eye level, such as in the crevices of a wall or the cracks at the edge of some steps. Border species do well woven throughout, you guessed it, borders, or naturalised in a wildflower or woodland edge garden. All can be grown in a container, though this is less practical for some of the taller border species.
Type | Suitable for | Avoid | Includes |
Low-growing, compact mound (rock garden) | Rockeries, walls, steps, front of well-draining borders | Wet soil, especially in winter | C. carpatica C. garganica C. portenschlagiana C. poscharskyana C. rotundifolia C. betulifolia C. garganica
|
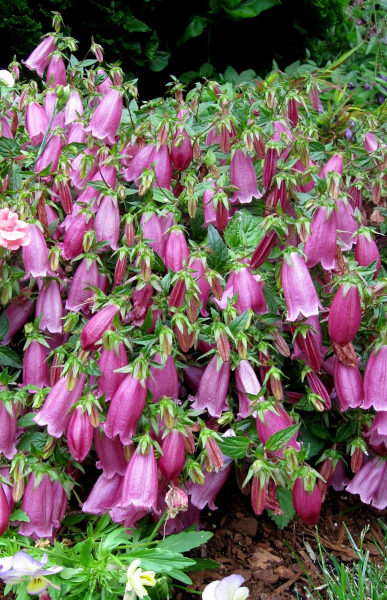
Tall and upright (border) | Borders of good garden soil, with a neutral to alkaline pH | Extremes of wet or dry, very acidic, or deep shade | C. lactiflora C. punctata C. glomorata C. latiloba C. trachelium C. latifolia C. medium C. thyrsoides
|
How to plant Campanula
- For planting in the garden, dig the soil area removing any large stones and weeds and breaking up any lumps. Border species like a fertile, well-draining soil so if your soil is poor, mix in some organic matter such as manure or garden compost. Rock garden species prefer free-draining soil, so if yours is anything other than this either add plenty of grit or sharp sand or consider growing in a container instead.
- Rake level and firm with your heels. Rake level again.
- Water plants well and allow to drain before planting.
- A good tip is to dig a hole twice the size of the root-ball. Fill with water and allow to drain before placing in the plant.
- Place the plant in the hole, ensuring the top of the root ball sits level with the surface of the soil. Too low and the plant may rot, too high and the roots can dry out.
- Backfill with soil and firm in gently with your foot.
- Soak well with water.
- Mulch around the base. For border species use well-rotted organic matter. For rock garden species, horticultural grit is best.
- For planting into a wall or crevice (rock garden species), simply excavate as large a cavity as you can, loosely fill with a sandy soil or compost mix, and push the small plant in. Compress with your fingers so that it holds tight, and thoroughly wet the soil/ compost with a gentle spray of water.
- For planting in containers, first choose an appropriately sized pot. You may wish to grow your campanula on its own in a pot just a few centimetres larger than the rootball, or as part of a larger, mixed container display (rock garden species are ideal for a stone trough). Either way, ensure there are plenty of drainage holes in the bottom.
- If you are using a large or heavy pot, it can be a good idea to fill and plant it in situ to save yourself the trouble of moving once full.
- Use a good quality potting compost with plenty of horticultural grit mixed in (extra for rock garden species – aim for at least 30% grit), and, if not already present in the compost some slow-release fertiliser granules.
- Start by partially filling the pot with compost; enough so that when placed on it the upper surface of the root ball is about 3cm lower than the top of the pot.
- Infill all the space surrounding the root ball with compost, firming down with your fingers then adding a little more so the plant is held tight.
- Pick up the container and lightly tap on the potting bench or ground a few times to help further settle the compost around the plant.
- Soak well with water.
- A mulch with horticultural grit will look attractive and help to prevent a ‘cap’ or crust forming on the top of the compost (something container plants can suffer due to the artificial nature of their watering).
What to plant with Campanula
If you are using rock garden species for its delicate crevice-colonising tendencies, try pairing with the similarly inclined Erigeron karvinskianus, aubrieta, creeping thyme, arenaria, and alchemilla.
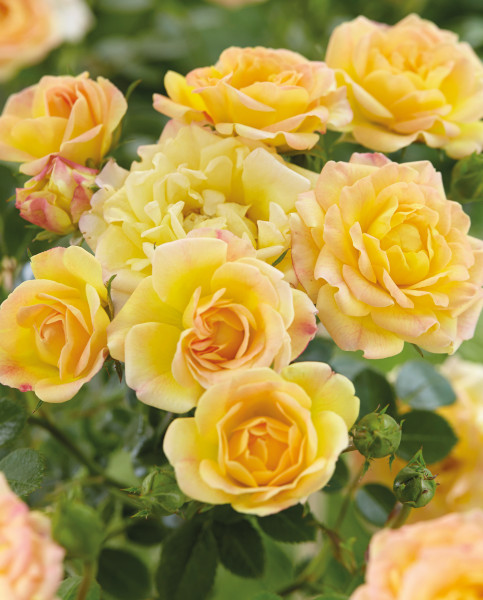
Border species mix beautifully with other reliable cottage garden staples such as scabious, salvia, hardy geranium, roses, nepeta, foxgloves, and phlox.

How to care for Campanula
Pruning and Deadheading
Cut back border species after flowering to encourage a second (albeit less profuse) flush of flowers. The exception to this is C. persicifolia, which produces its second flush on the same stems as the first, so should be left intact.
To encourage self-seeding, allow some flower stems to remain on the plant into autumn. Alternatively, to prevent this type of spreading, simply remove flower stems as soon as they begin to fade. For perennials, cut the whole plant back to just above ground level in autumn or spring. Annuals (such as C. medium or C. thyrsoides) can be removed to the compost heap.
Rock garden species need only a light trim immediately after flowering.
Watering
Water newly planted campanula regularly until established (the first few weeks in the ground), and then in very hot dry spells after this. Aim for consistently moist but not soggy soil – allowing the top couple of centimetres to dry out before watering (wiggle your finger down into the soil to check this).
Container-grown campanula need regular watering throughout the growing season as they can dry out very quickly. Again, aiming to allow the top few centimetres of compost to dry out between soakings is a good rule of thumb to help avoid overwatering, though be aware that in the height of summer this can take as little as 24 hours. Take care not to have rock garden species sitting too wet – a very free-draining compost mix is key.
Feeding
On most soils, a mulch of well-rotted organic matter (i.e., a layer of manure or garden compost applied to the soil around the plant) should provide sufficient nutrients for border species. This has the added benefit of suppressing weeds and locking in moisture. Mulch when planting, and then again each spring.
If you garden on very poor soil applying a general-purpose granular feed to the surface of the soil and lightly working in (known as a ‘top dress’) can reap benefits. Do this when mulching in spring – first apply the top dress, then cover with the mulch.
Border species in a container are a little different, relying solely on the gardener for nutrition. Get off to a flying start by making sure you use a good quality potting compost with some slow-release fertiliser granules mixed in. After this, a monthly application of balanced liquid feed throughout the growing season (seaweed feed is ideal) will encourage healthy growth. Remember also to repot your plants every few years into a slightly larger container using fresh compost.
Rock garden species are less hungry and tend not to need any extra fertiliser when grown in the open ground. Those in containers may, over time, benefit from some slow-release, low-nitrogen feed. Either mix this into the compost when potting/ repotting or apply as a ‘top dress’. This is when you scrape away the top 5cm of compost in a container and replace it with a fresh mix containing a small amount of feed. Aim to carry out in spring.
Cold Protection
While there are some tender species of campanula, these are less common and tend to be grown mainly by specialists. Those species widely available to gardeners are all hardy enough to withstand a UK winter without the need for additional protection.
Pests and Diseases
Campanula is generally quite robust, although slugs and snails can be a nuisance, when plants are young. Encouraging natural predators into your garden, such as birds, frogs, toads, and hedgehogs, will make a big difference. Torchlight searches after dark (when slugs and snails are at their most active) are also effective, allowing you to collect the offending molluscs in a bucket and dispose of as you see fit. Relocating to a nearby woods or bagging up and putting in your freezer before popping them in the bin are said to be the most humane approaches.
A fungal disease known as powdery mildew can also crop up, appearing as a white, powder-like coating on foliage. This is generally a sign that a plant is stressed – often through lack of water, though other causes can include poor airflow, over fertilizing, and insufficient sunlight.
Prune off and dispose of any affected leaves and if necessary, thin out surrounding plants to improve airflow and light levels. Do not be tempted to give the plant extra feed, as this will generate an excess of soft, new growth which is particularly susceptible to the fungus.
How to propagate Campanula
The quickest and easiest way to propagate perennial species of campanula is to lift and divide established plants, either in autumn or spring. As well as providing new plants this is recommended as a routine maintenance practice, done every 2 to 3 years to maintain the vigour of existing clumps.
- Choose a day when the soil is not frozen or waterlogged.
- Dig the plant out of the ground.
- Shake off any excess soil.
- Separate the plant into sections using either swift, cutting blows with a sharp spade, or two forks inserted back-to-back with tines touching, handles then pushed together to prise the plant apart.
- Discard old, damaged, or surplus pieces, keeping healthy, vigorous material.
- Replant decent-sized pieces where desired, and any smaller bits can be potted up.
- Water well until fully established.
Annual species are very easy to grow from seed, and in fact a natural propensity to self-sow means the best way to ensure their continued presence in the garden is to leave them to it! By this we mean leaving plants intact until their seeds have ripened and dispersed, along with taking care not to weed seedlings out when tidying the area.
If you’d like to propagate new plants to use elsewhere, collect and sow the seeds as follows:
- Seeds are typically ready for collecting in mid to late summer when they’ve turned hard and black.
- Snip the seedheads from the plant using scissors or secateurs. Try to do this in dry conditions, and shake the seeds into a small, labelled paper bag or envelope. Store somewhere cool and dry until it is time to sow the following spring.
- In April, fill a seed tray or small pot with a well-draining compost mix, compressing the surface lightly with a flat piece of wood or the bottom of another pot.
- Sprinkle the seeds evenly over the surface of the compost.
- Use a garden sieve to cover with a fine layer of compost.
- Water the soil gently with a fine spray until it is evenly moist but not waterlogged.
- Place the seed tray or pots anywhere light, cool, and protected, such as a windowsill, coldframe, or unheated greenhouse.
- When the seedlings have grown large enough to handle, plant out into the garden following our ‘How to plant campanula’ section above.
* Many plants carry Plant Breeders Rights and cannot be propagated for commercial purposes.