


How to grow Athyrium niponicum var. pictum
A stunning variety of Japanese Painted Fern, these delicately beautiful deciduous perennials will light up the shady corners of your garden. They grow to a height of between 30-50cm with a spread of up to 1m and like a moist, humus rich soil in part sun or full shade to perform to their best. Plant at any time between January and September and foliage will emerge in April lasting throughout the growing season. Leaves die back with the first frosts and the fern remains dormant under the surface, ready to emerge the following spring. Despite its delicate appearance Athyrium is hardy to -20°c and can be propagated by division in spring.
Athyrium niponicum var, pictum has received a prestigious Award of Garden Merit (AGM) from the Royal Horticultural Society for its outstanding attributes.
Key Information
Soil pH

Position
Hardiness

Where & when to plant Athyrium niponicum var. pictum
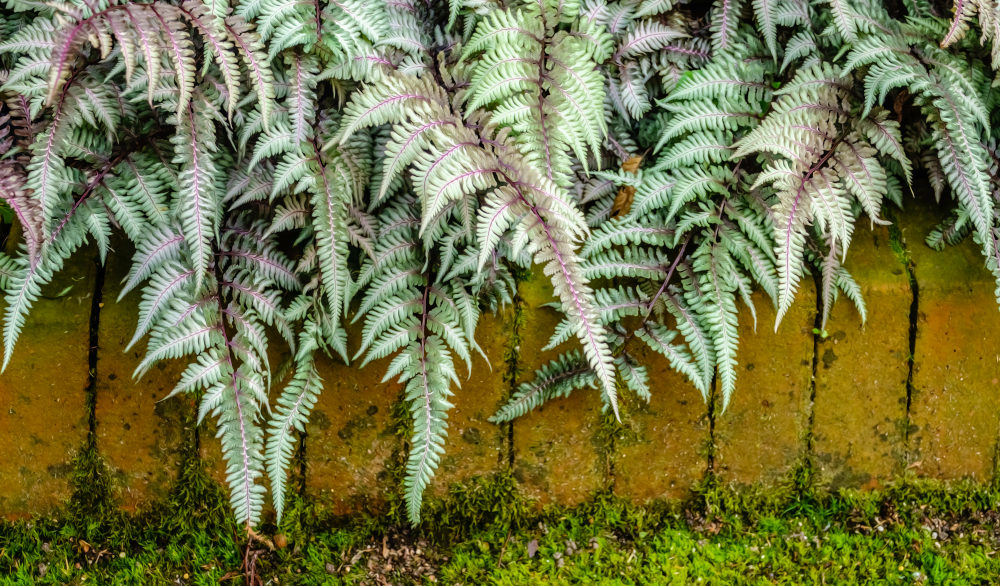
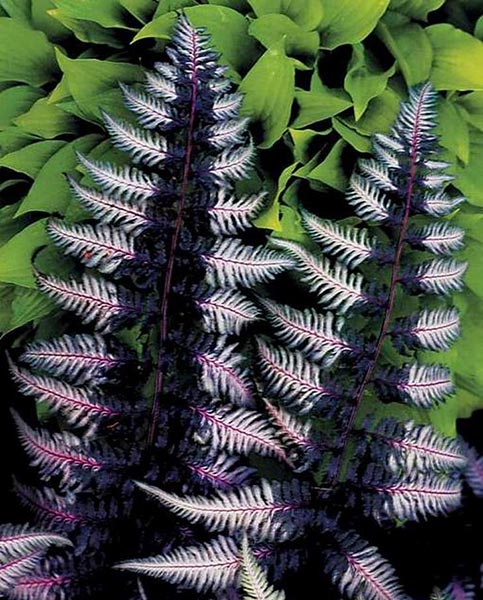
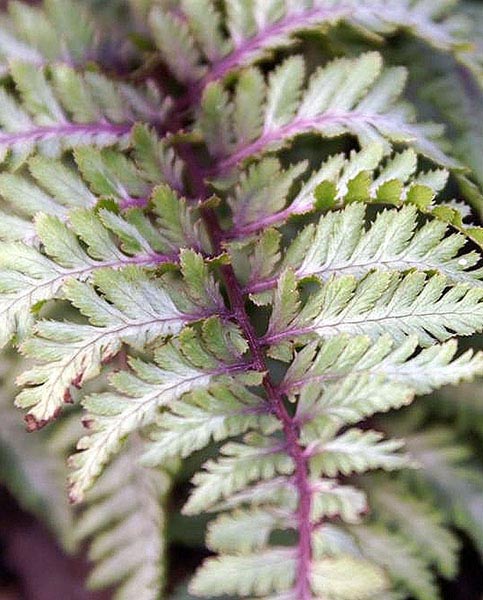
Athyrium niponicum var. pictum is often referred to by its common name ‘Japanese Painted Fern’ and is recognised by and loved for its silvery-grey foliage which has beautiful contrasting purple veins and stems.
Plant your young Athyrium niponicum var. pictum in spring or autumn when the soil is warm enough for them to begin putting down roots. Choose a spot in full or part shade where their delicate leaves will not be scorched by sunlight and the soil will remain moist all year round.
Avoid planting in an area which is exposed to harsh winds as the delicate fronds may be easily damaged.
If you are planting several of these elegant ferns together, space your plants at least 30cm apart. When planted in groups, the overall effect is stunning and looks particularly attractive as groundcover or edging to a shady pathway.
Athyrium niponicum var. pictum thrives best in soil which is fertile and remains moist but well-drained. As with most ferns, this cultivar prefers a soil with a pH level which is neutral to slightly acidic - if you garden on soil which you know to be alkaline, add some ericaceous compost to the planting area first and dig it in thoroughly.
How to plant Athyrium niponicum var. pictum
Dig a hole with a garden trowel or shovel which is slightly deeper and wider than your potted fern and add plenty of leaf mould to the base of the hole to improve soil structure and provide nutrients for your young plant.
Gently tease your plant from its pot and loosen the roots before placing it into the hole with the crown just below soil level. Add some loose garden soil around the sides and top of the plant and firm it into place before watering well.
Athyrium niponicum var. pictum also grow well in pots and make a great outdoor table-top display for year-round interest in a slightly shaded area. Use a mix of good quality compost, leaf mould, and a little grit for potted ferns and ensure your pot has drainage holes in the bottom.
What to plant with Athyrium niponicum var. pictum
Athyrium niponicum var. pictum are wonderful plants to light up any shady border or corner of your garden.
This low-growing fern will provide excellent attractive groundcover, especially at the edge of a woodland garden or beneath trees and shrubs. Although Athyrium niponicum var. pictum is happy in full shade, the best foliage colouring is achieved with a little, dappled sunlight.
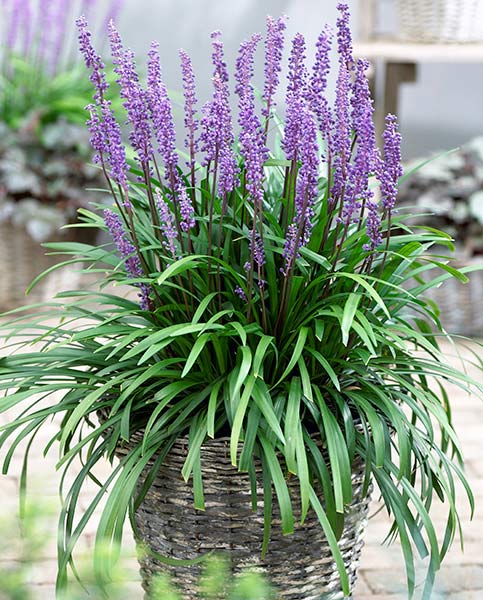
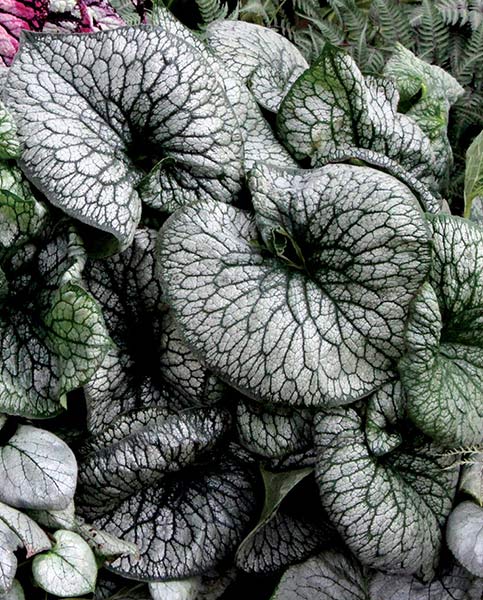
We recommend combining lush-leaved foliage plants such as Hosta and other Ferns as companion plants. Equally other delicate shade loving plants will set the beautiful leaves of Athyrium niponicum var. pictum off to perfection. Some of our favourites at Hayloft are - Epimedium, Brunnera, Solomon’s seal, Liriope muscari, Tiarella, Pulmonaria, Dog’s tooth violets, Cyclamen, and Dicentra.
Feel free to contact our expert friendly Customer Care Team at Hayloft if you would like any further advice or gardening ideas for your Athyrium niponicum plants.
How to care for Athyrium niponicum var. pictum
Water your young Athyrium niponicum var. pictum at least twice a week for the first few weeks, especially if the weather is dry.
Providing you have planted these ferns in a shady spot, the soil should remain moist enough not to require regular watering once the fern has established itself.
When watering, take care to keep the soil damp but not waterlogged as this could result in your ferns rotting away.
Leave the dead foliage on your Athyrium niponicum var. pictum plants over winter to help protect the crown and developing fronds from frost.
An annual autumn mulch of leaf mould, several inches thick, is beneficial to protect and feed your plants - ensuring they remain healthy and lush.
Remove the dead stems from your plants in spring to make way for newly emerging fronds and apply a balanced fertiliser at the same time to boost growth.
How to propagate Athyrium niponicum var. pictum

Athyrium niponicum var. pictum are usually propagated by division – this is by far the simplest and most reliable form of propagation, although this fern can also be grown by germinating its mature spores – a much slower form of reproduction. Athyrium niponicum ferns will easily naturalise an area where they are happy, spreading by roots and rhizomes underground. Dividing mature plants will help to maintain their vigour as well as increasing your stock for other parts of the garden or sharing with friends and family.
Dig out fresh planting holes and add handful or two of leaf mould to each if you are replanting the new sections straight away. Alternatively, have pots with humus-rich compost ready to plant the new divisions into. Using a garden fork, dig carefully around and under your fern and lift out the entire plant.
Separate the clump into several smaller pieces by hand, ensuring you have several coiled fronds attached to each section of root. You can use a sharp knife to cut through the roots if you cannot split the plant easily. Plant your new divisions into their holes or pots and water well for the first few weeks until they have established themselves.