


How to grow Asclepias
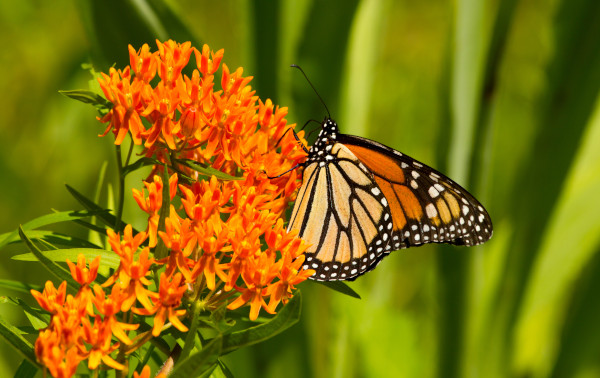
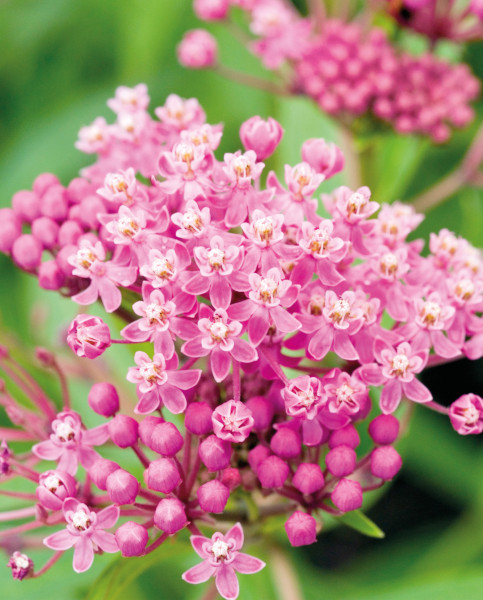
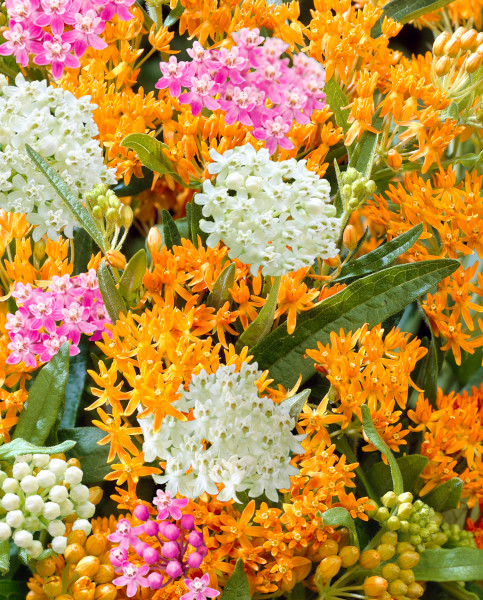
Also known as butterfly weed, milkweed, silkweed, or blood flower depending on the species, asclepias is a diverse and varied genus of perennial plants with some of the most unusual and complex flowers in the plant kingdom. Held in umbel-like heads, the individual flowers are often waxy and can be white, pink, bright red, or orange. These give way to spindle-shaped green fruits which ripen to yellowish brown before splitting open to reveal rows of seeds with long, white, silky hairs attached (hence the common name silkweed).
Asclepias is a valuable plant for pollinators including bees, moths, and butterflies, and is famously the host plant for monarch butterflies. Its hardiness and preferred growing conditions can vary significantly according to the species. See below for more information.
Key Information
Soil pH

Position
Hardiness

Where to plant Asclepias
Asclepias can be bought as either pot-grown plants (usually in spring and summer), or as bareroot plants during dormancy.
Plant bareroots straight into the ground on arrival, or, in the event of frozen or very wet weather, temporarily pot into a container of damp compost so you can wait for better conditions.
Pot-grown plants can be planted out at any time during the growing season, though for best results aim for spring or autumn. An autumn planting can be done by those gardening in mild conditions (and broadly speaking, this is the southern half of the UK). For those liable to cold winters, it is best to wait until spring (generally the northern half of the UK). Planting can also be carried out in summer, though be prepared to water regularly.
Many species of asclepias makes a striking, showy addition to a sunny border or container display. The spreading species are best used in more wild, natural parts of the garden as they can be difficult to control in a border (see the chart above), and the damp, boggy-loving species do well at the edge of a stream or pond.
The exception to this is tender species such as A. curassavica, which are best grown in a pot in a bright, warm, indoor environment, and only moved outside during the warm summer months.
How to plant Asclepias
- For planting in the garden, first of all choose your spot carefully – many species of asclepias have long tap roots and resent disturbance once established, making it important to get the location right first time!
- Dig the soil area removing any large stones and weeds and breaking up any lumps. Mix in some organic matter such as manure or garden compost. Rake level and firm with your heels. Rake level again.
- Water plants well and allow to drain before planting.
- A good tip is to dig a hole twice the size of the root-ball. Fill with water and allow to drain before placing in the plant.
- Place the plant in the hole, ensuring the top of the root ball sits level with the surface of the soil. Too low and the plant may rot, too high and the roots can dry out.
- Backfill with soil and firm in gently with your foot.
- Soak well with water.
- Mulch around the base with well-rotted organic matter.
- For planting in containers, first choose an appropriately sized pot. The best practice is to start just a few centimetres larger than the rootball and increase in size every year or two. Make it a deep pot to accommodate what can be a long tap root, and always ensure there are plenty of drainage holes in the bottom.
- If you are using a large or heavy pot, it can be a good idea to fill and plant it in situ to save yourself the trouble of moving once full.
- Use a good quality potting compost with some horticultural grit mixed in, and, if not already present in the compost (check the description on the bag) some slow-release fertiliser granules.
- Start by partially filling the pot with compost; enough so that when placed on it the upper surface of the root ball is about 3cm lower than the top of the pot.
- Infill all the space surrounding the root ball with compost, firming down with your fingers then adding a little more so the plant is held tight.
- Pick up the container and lightly tap on the potting bench or ground a few times to help further settle the compost around the plant.
- Soak well with water.
- A mulch with horticultural grit will look attractive and help to prevent a ‘cap’ or crust forming on the top of the compost (something container plants can suffer due to the artificial nature of their watering).
How to care for Asclepias
Pruning and Deadheading
Asclepias is an herbaceous perennial, meaning it dies back for winter and regrows each spring. Cut the whole plant back to just above ground level either in autumn or spring. Try to aim for spring if you can, as when left intact the dried and withered stems provide a habitat for overwintering insects.
Watering
Most species of asclepias will need to be regularly watered during their first growing season in the ground, after which they should need it only in very hot, dry weather.
Container-grown asclepias has less access to moisture so will need regularly watering throughout every growing season. Allowing the top few centimetres of compost to dry out between soakings is a good rule of thumb, being aware that in the height of summer this can be as often as every day. To check, wiggle your finger down until you hit moisture. From mid-autumn, the British climate tends to take over watering needs, though do remember to step in in the event of an unseasonably dry spell.
Those species of asclepias that prefer very damp, boggy conditions (A. incarnata and A. speciosa), will need to be kept consistently moist at all times. Plant near a body of water or in poorly draining soil and remember to water in times of drought. A mulch once or twice a year will help to lock in moisture (see below).
Feeding
On healthy, fertile soil, an annual mulch of well-rotted organic matter (i.e., a layer of manure or garden compost applied to the soil around the plant) should provide enough nutrients for your asclepias. This has the added benefit of suppressing weeds and locking in moisture. Autumn or spring are the best times to mulch.
If you garden on poor soil, applying a general purpose granular feed to the surface of the soil and lightly working in (known as a ‘top dress’) can reap benefits. Do this when you’re mulching – first apply the top dress, then cover with the mulch.
Container-grown plants are different, as they rely solely on the gardener for nutrition. Get off to a flying start by making sure you use a good quality compost, then throughout the growing season (March to September) apply a fortnightly liquid feed.
Cold Protection
The need for winter protection depends on the hardiness rating of the species or cultivar you are growing. Check our chart above or each plant’s individual description for details, then work from the following advice.
Tender asclepias rated H1C (A. curassavica), won’t withstand temperatures lower than 5°C, so should be grown indoors (i.e., in a conservatory, sunny porch, or greenhouse) for much of the year. You can move these outside during the warm summer months but remember to bring them inside again when temperatures start to drop.
Those with a rating of H4 (e.g., A. incarnata, A. tuberosa, and A. syriaca) can struggle in a very cold, wet winter, so if you live in the north it can be worth protecting these over winter with a dry mulch. Any H4 plant in a container will benefit from being wrapped in fleece, hessian, or bubblewrap in all but the mildest or most protected spots.
H5 rated asclepias should be fine in all but the most exposed spots. Again, protect those in containers as above.
Asclepias with a H6 rating can be relied upon to get through winter without concern. You may wish to protect those in a container if you’re in a very cold, exposed area. Otherwise, leave them to it!
H7 rated plants are as hardy as it gets and can be expected to make it through even the most severe winter without the need for additional protection.
It is worth noting that for any plant requiring good drainage, hardiness can be significantly reduced by soil becoming waterlogged during the winter months.
Pests and Diseases
Asclepias is considered problem-free.
How to propagate Asclepias
The quickest and easiest way to propagate asclepias is by lifting and dividing established clumps in spring. As well as providing new plants this has the added benefit of reinvigorating existing clumps. Allow 2-3 years between each division so the plant can sufficiently re-establish.
- Choose a day when the soil is not frozen or waterlogged.
- Dig the plant out of the ground.
- Shake off any excess soil.
- Separate the plant into sections using either swift, cutting blows with a sharp spade, or two forks inserted back-to-back with tines touching, handles then pushed together to prise the plant apart.
- Discard old, damaged, or surplus pieces, keeping healthy, vigorous material.
- Replant decent-sized pieces where desired, and any smaller bits can be potted up.
- Water well until fully established.
Basal cuttings in spring are another option and can be done with greater frequency than divisions.
- Find several strong, basal shoots (originating from the crown) around 10cm long.
- With sharp secateurs or a knife, sever cleanly from as close to the base as possible.
- Put them in a plastic bag straight away to prevent drying out.
- Fill a container with a compost mix which is at least 50% perlite (or if you prefer, as we do, 100% perlite).
- Remove the lowest third of leaves.
- If the remaining leaves are large, cut them in half with a sharp knife (to reduce water lost through transpiration).
- Insert the cuttings into the compost and water lightly. Several cuttings can be put in the same container if there is enough space to do this without them touching.
- Place in a greenhouse or propagating unit if you have one or covered with a plastic bag on a windowsill if not (out of direct sunlight).
- Keep the cuttings misted and occasionally watered until they root. You will know this has happened when roots emerge out of the bottom of the container.
- Gently remove rooted cuttings and pot them into individual pots. Grow on in an unheated yet protected environment such a conservatory, greenhouse, or cold frame until they are large enough to plant out.
* Many plants carry Plant Breeders Rights and cannot be propagated for commercial purposes.
Common Asclepias questions
- Can asclepias be grown in pots?
They can, although many species develop a long tap root which will, over time, resent being constrained in a pot.
Our advice is to take basal cuttings after a couple of years, so that you have fresh, replacement plants waiting in the wings when the parent plant outgrows its pot. - Does milkweed need sun or shade?
This is a sun-loving plant which needs full sun to thrive. - Do milkweed plants spread?
Most species are fairly well-behaved, clump-forming perennials. They may self-seed in the surrounding area, but this can easily be avoided by deadheading spent flowerheads before they have a chance to set seed.
Some species spread aggressively via underground rhizomes and are not recommended for use in borders (e.g., hallii and A. syriaca).