


How to grow Aquilegia
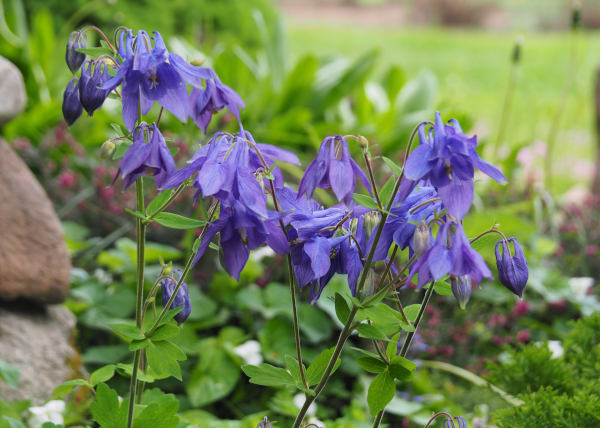
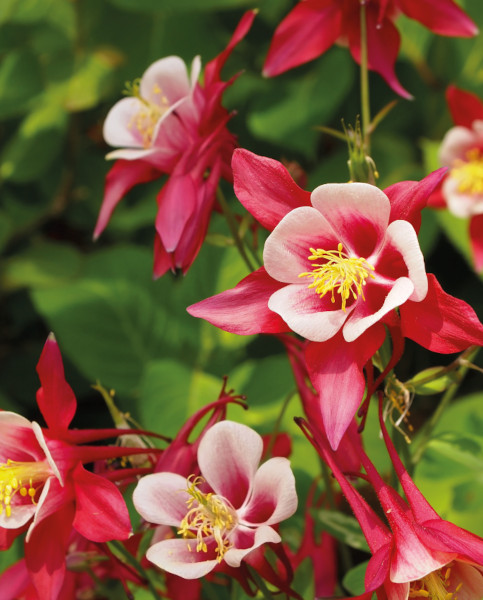
This member of the buttercup family is made up of around 70 species of clump-forming perennial. It is cultivated for its nodding, bell-shaped flowers often with spurred petals, and delicate, fern-like, semi-evergreen foliage. There are a vast range of cultivars available, from frilly doubles to understated singles, in a broad spectrum of colours. As a garden plant, aquilegia is highly valued by gardeners for its bridging of spring and summer. Individual plants are relatively short-lived, but a propensity to self-seed means they tend to remain a lasting presence in the garden.
Aquilegia is also known by the common names of columbine and granny’s bonnet.
Key Information
Soil pH

Position
Hardiness

Where to plant Aquilegia
For best results, plant in autumn or spring. An autumn planting can be done by those gardening in mild conditions (and broadly speaking, this is the southern half of the UK). For those liable to cold winters, it is best to wait until spring (generally the northern half of the UK). Planting can also be carried out in summer, though be prepared to water regularly.
Aquilegia is a cottage garden favourite perfect for weaving throughout informal borders, naturalising at the edge of a woodland garden, or brightening container displays. Whether you go for the compact species such as Aquilegia alpina or A. flabellata, or the taller A. vulgaris and A. caerulea, there is an aquilegia to suit almost all gardens and tastes.
How to plant Aquilegia
Aquilegia is available both in potted plant and bare root form. Try to plant your bare roots as soon as possible, as allowing them to dry out tends to spell disaster! If you are unable to do this, place in a pot or bucket filled with damp compost as a temporary measure. Soak the bare roots in water for approximately 3 hours prior to planting.
In the ground
- Clear the chosen area of weeds.
- Dig a planting hole several times larger than the root ball. Now is the time to improve your soil with a generous addition of well-rotted organic matter and plenty of horticultural grit.
- Place the plant in the hole, ensuring the top of the root ball sits level with the surface of the soil. Too low and the plant may rot, too high and the roots can dry out.
- Backfill with soil and firm in gently.
- Soak well with water.
- Mulch with well-rotted organic matter.
In a container
- Choose an appropriate container, ensuring there are plenty of drainage holes.
- Use a good quality potting compost with plenty of horticultural grit mixed in and, if not already present in the compost (check the description on the bag) some slow-release fertiliser granules.
- Start by partially filling the pot with compost; enough so that when placed on it the upper surface of the root ball is about 3cm lower than the top of the pot.
- Infill all the space surrounding the root ball with compost, firming down with your fingers then adding a little more so the plant is held tight.
- Pick up the pot (if you can) and lightly tap on the potting bench or ground a few times to help further settle the compost around the plant.
- Soak well with water.
- A mulch with horticultural grit will look attractive and help to prevent a ‘cap’ or crust forming on the top of the compost (something container plants can suffer due to the artificial nature of their watering).

How to care for Aquilegia
Pruning and Deadheading
Cut back after flowering to prevent self-seeding and encourage a fresh, new burst of foliage. A good soak of water at the same time will help with the latter, particularly if the ground is dry.
If you would like your aquilegia to self-seed around the garden, leave a few spent flowers intact. It is worth noting the seedlings are unlikely to come true to the parent plant, though can still offer good results.
Watering
Water until established, after which aquilegia tends to be drought tolerant.
Cold Protection
Aquilegia is hardy and able to withstand a UK winter without the need for additional protection.
Pests and Diseases
Aquilegias are easy and reliable, though can be affected by a few pests and diseases. Aquilegia sawfly can cause defoliation during summer, aphids are partial to the sap, and powdery mildew can crop up – particularly if a plant is under water stress and especially after flowering.
While these can be unsightly, we as always encourage mild cases to be not only tolerated but viewed as part of a healthy garden ecosystem. That said, steps can be taken to minimise plants’ vulnerability to pests and diseases. This mainly means growing healthy, robust specimens by ensuring adequate nutrients, water, airflow, and light. Encouraging natural predators into the garden is also highly effective – try adding things such as bird feeders, ponds, and hedgehog habitats.
How to propagate Aquilegia
Aquilegia will readily self-seed throughout an area if its seedheads are left intact. While these will rarely come true to the parent plant, the results can be pleasing. The exception to this is the ‘Nora Barlow’ and ‘Nivea’ cultivars which, if grown in isolation from other aquilegias, have often been known to come true from seed.
To get plants identical to the parent plant you can divide the original in spring, though be aware that aquilegias resent root disturbance so can be a little slow to recover (this might take the form of a year off from flowering).
- Choose a day when the soil is not frozen or waterlogged.
- Dig the plant out of the ground.
- Shake off any excess soil.
- Separate the plant into sections using either swift, cutting blows with a sharp spade, or two forks inserted back-to-back with tines touching, handles then pushed together to prise the plant apart.
- Discard old, damaged, or surplus pieces, keeping healthy, vigorous material.
- Replant decent-sized pieces where desired, and any smaller bits can be potted up.
- Water well until fully established.