


How to grow Anthriscus
.
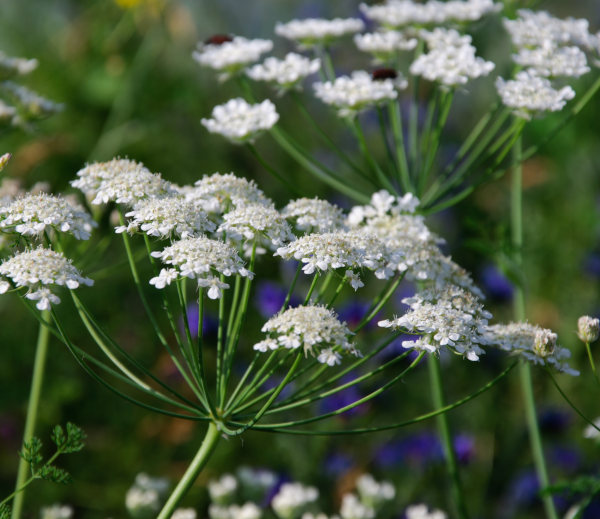
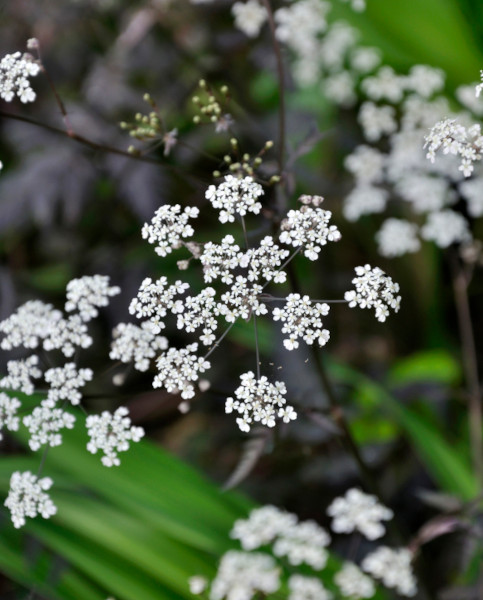
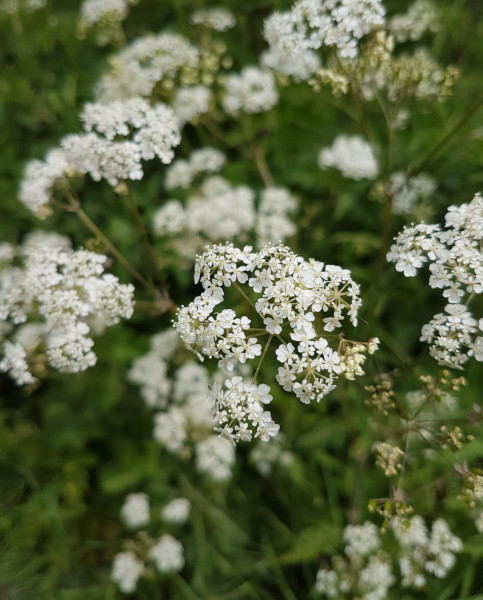
Belonging to the carrot family (apiaceae), this genus consists of around 12 species of annuals, biennials, and perennials. Most notable among these are the annual herb A. cerefolium (common chervil), and the short-lived perennial wildflower A. sylvestris (cow parsley). The straight species of A. sylvestris is native to the UK where its late spring mass of frothy, white umbel flowers is a familiar sight along road verges and in meadows. There are many cultivated forms, though the dark purple ‘Ravenswing’ is best known and a popular garden plant.
- sylvestris is also known by another common name of Queen Anne’s lace, although, somewhat confusingly, this is sometimes applied to ammi and wild carrot as well.
Key Information
Soil pH

Position
Hardiness

Where to plant Anthriscus
For best results, plant your anthriscus out in spring or as soon as it arrives. Anthriscus sylvestris is a tall plant, particularly ‘Ravenswing’, and so is suited to the middle or back of a border or a tall grass meadow. It has a naturally loose, airy, wild appearance and a tendency to seed around, so does best in an informal, naturalistic, or cottage style garden.
Anthriscus cerefolium is popularly grown as a culinary herb (its leaves have a flavour somewhere between parsley and aniseed), and is often included in a herb or kitchen garden. It is best grown from seed, sown in small successional sowings from early spring to midsummer. The aim with this is to have a ready supply of fresh leaves – once flowers appear the leaves become less palatable.
How to plant Anthriscus
- For planting in the garden, dig the soil area removing any large stones and weeds and breaking up any lumps. You don’t have to improve the soil with organic matter such as manure or garden compost, though it will give you larger plants if you do.
- Rake level and firm with your heels. Rake level again.
- Water plants well and allow to drain before planting.
- Dig a hole twice the size of the root-ball.
- Place the plant in the hole, ensuring the top of the root ball sits level with the surface of the soil. Too low and the plant may rot, too high and the roots can dry out.
- Backfill with soil and firm in gently with your foot.
- Soak well with water.
- Mulch around the base with well-rotted organic matter.
- For planting in containers, first choose an appropriately sized pot. sylvestris is better suited to the open ground, though if you do wish to try it in a pot go for one with a diameter of at least 30cm to support the tall and weighty top growth. A. cerefolium can be grown in any container such as a mixed herb pot or planter. In any case, ensure there are plenty of drainage holes in the bottom.
- If you are using a large or heavy pot, it can be a good idea to fill and plant it in situ to save yourself the trouble of moving once full.
- Use a good quality potting compost with some horticultural grit mixed in and, if not already present (check the labelling on the bag) some slow-release fertiliser granules.
- Start by partially filling the pot with compost; enough so that when placed on it the upper surface of the root ball is about 3cm lower than the top of the pot.
- Fill around the plant with compost, firming down with your fingers then adding a little more so it is held tight.
- Pick up the container (if you can!) and lightly tap on the potting bench or ground a few times to help further settle the compost around the plant.
- Soak well with water.
- A mulch with horticultural grit will look attractive and help to prevent a ‘cap’ or crust forming on the top of the compost (something container plants can suffer due to the artificial nature of their watering).
How to care for Anthriscus
Pruning and Deadheading
For A. sylvestris, no pruning is needed other than a chop down to the ground in autumn or spring.
If you wish to prevent what can be prolific self-seeding, remove spent flowerheads before they have a chance to set seed. However, allowing some spreading to occur in this way is a good way to ensure a continuation of the plant in your garden. While individual plants can be expected to die out after a couple of years, left to self-seed their offspring will appear in and around the same spot.
- ceerefolium is an annual plant which can simply be removed to the compost heap at the end of its use, or left to die back naturally.
Watering
Anthriscus in the ground should be given a good watering in on planting and a couple more times after this, then should be self-sufficient in all but the hottest, driest weather. Having said this, keeping the soil consistently moist will result in larger plants, and in the case of A. cerefolium avoid the plant bolting to seed.
Anthriscus in a container requires regular watering throughout the growing season. To avoid overwatering (anthriscus dislikes sitting in soggy compost), a good rule of thumb is to allow the top couple of centimetres to dry out between soakings. To check this, wiggle your finger down into the compost until you feel moisture. Be aware that in the height of summer containers may need watering every day, especially smaller ones.
Feeding
Anthriscus is not a hungry plant and on healthy, fertile soil shouldn’t require feeding to perform well.
If you garden on particularly poor or sandy soil, applying a general-purpose granular feed to the surface of the soil and lightly working it in can provide a welcome boost. This is known as a top dress and should be done in spring.
Container-grown plants are different as they rely solely on the gardener for nutrition. Get off to a flying start by making sure you use a good quality compost with slow-release granules mixed in. These generally provide nutrients for around 6 to 8 weeks, after which a liquid feed every 4 weeks until the end of the growing season will ensure a healthy, thriving plant.
Cold Protection
Anthriscus is hardy enough to withstand winter throughout the UK without the need for any special attention. Simply avoid planting anywhere prone to winter waterlogging.
Pests and Diseases
Anthriscus is generally quite robust, although slugs and snails can be a nuisance, when plants are young. Encouraging natural predators into your garden, such as birds, frogs, toads, and hedgehogs, will make a big difference. Torchlight searches after dark (when slugs and snails are at their most active) are also effective, allowing you to collect the offending molluscs in a bucket and dispose of as you see fit. Relocating to a nearby woods or bagging up and putting in your freezer before popping them in the bin are said to be the most humane approaches.
A fungal disease known as powdery mildew can also crop up, appearing as a white, powder-like coating on foliage. This is generally a sign that a plant is stressed – often through lack of water, though other causes can include poor airflow, over fertilizing, and insufficient sunlight.
Prune off and dispose of any affected leaves and if necessary, thin out surrounding plants to improve airflow and light levels. Do not be tempted to give the plant a feed, as this will generate an excess of soft, new growth which is particularly susceptible to the fungus.
How to propagate Anthriscus
Such is the readiness with which this plant spreads via self-seeding, the easiest approach to getting new plants is to simply do nothing!
The exception to this is in cultivated forms such as ‘Ravenswing’, which tend not to come true to the parent plant unless grown in isolation from other anthriscus (difficult in the UK where the wild native species is so widespread). Your best bet is to either buy new plants or seeds, or take root cuttings in midwinter:
- Dig up a healthy, vigorous clump and wash the roots in water.
- Select pencil thick roots, severing close to the crown with a sharp knife or secateurs.
- Remove no more than a third of the roots and replant the clump as soon as possible.
- Trim off the thin end of each root, along with any fibrous side roots.
- Cut into 5cm lengths, using an angled cut at the bottom so you know which way is up.
- Fill a container with a grit or perlite-heavy compost mix.
- Insert the root cuttings, angled side down, pushing them down so that the horizontal top end sits just below the surface of the compost.
- Cover with about 1cm of horticultural grit.
- Place in a coldframe, unheated greenhouse, or on a cool windowsill and water in lightly.
- Expect to see signs of life the following spring, at which point you can pot each cutting into individual 9cm pots. Grow on until the plants are large enough to be planted out the following year.
* Many plants carry Plant Breeders Rights and cannot be propagated for commercial purposes.