


How to grow Anisodontea
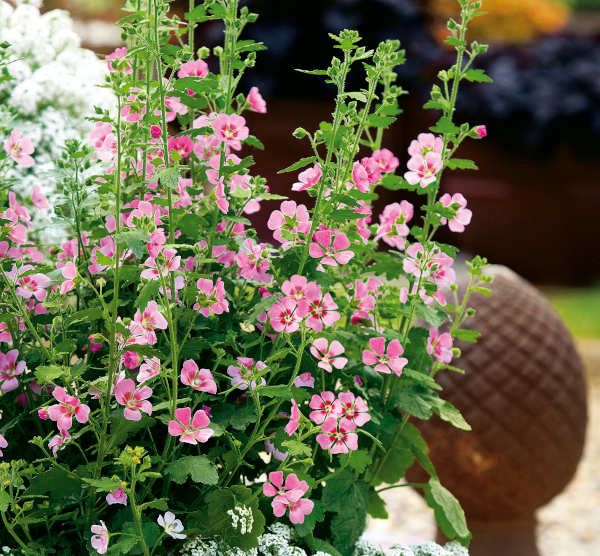
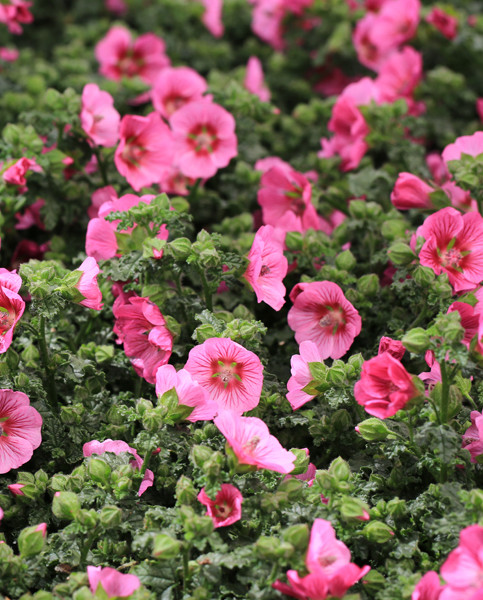
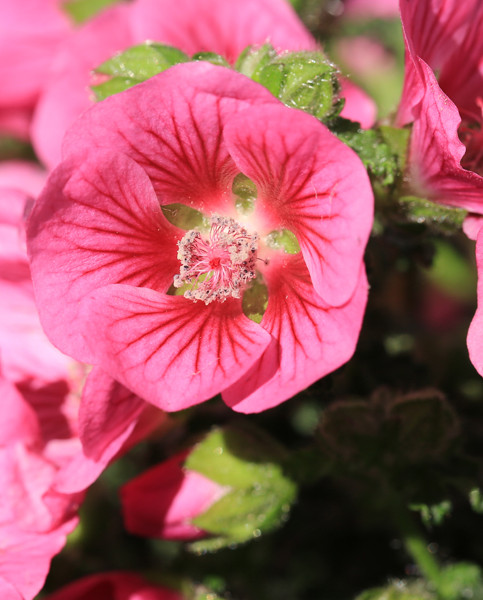
Native to South Africa, this member of the hollyhock family can be a shrub or woody-based perennial, depending on the species. It is cultivated for its profusion of usually pink, mallow-like flowers and will flower every day of the year if kept frost-free. The lobed foliage is evergreen, though in chillier climates such as ours it can be more semi-evergreen.
There are 21 species of anisodontea, though the most commonly grown by gardeners is Anisodontea capensis – also known as the Cape mallow.
Key Information
Soil pH

Position
Hardiness

Where to plant Anisodontea
For best results, plant anisodontea in spring after the last risk of frost has passed (this varies from region to region, though is generally around May). Planting can also be carried out in summer, though be prepared to water regularly.
If you are lucky enough to offer a frost-free microclimate – perhaps in a southern coastal garden, a small urban garden, or in a sheltered spot against a warm, south-facing wall, your anisodontea can be grown in the ground. Otherwise, you are advised to grow it in a container to allow for overwintering in a protected environment such as a greenhouse or conservatory. That said, with a strong enough growing season behind it, anisodontea can sometimes defy its ‘tender’ hardiness rating and come through a mild frost unscathed, so leaving it in the ground for winter is by no means a guaranteed death sentence. Anisodontea comes easily from cuttings, meaning you will be able to equip yourself with plenty of ‘insurance plants’ should you wish to take this gamble.
How to plant Anisodontea
In the ground
- Clear the chosen area of weeds.
- Dig a planting hole several times larger than the root ball. Now is the time to give your soil a boost by mixing in generous amounts of well-rotted organic matter, and, if it is on the heavy side, some horticultural grit.
- Place the plant in the hole, ensuring the top of the root ball sits level with the surface of the soil. Too low and the plant may rot, too high and the roots can dry out.
- Backfill with soil and firm in gently.
- Soak well with water.
- Mulch with well-rotted organic matter.
In a container
- Choose an appropriate container, ensuring there are plenty of drainage holes in the bottom.
- Use a good quality potting compost with plenty of horticultural grit mixed in, and, if not already present in the compost (check the description on the bag) some slow-release fertiliser granules.
- It can be a good idea to pot up larger containers in situ to save yourself the trouble of moving once full.
- Start by partially filling the pot with compost; enough so that when placed on it the upper surface of the root ball is about 3cm lower than the top of the pot.
- Infill all the space surrounding the root ball with compost, firming down with your fingers then adding a little more so the plant is held tight.
- Pick up the pot (if you can!) and lightly tap on the potting bench or ground a few times to help further settle the compost around the plant.
- Soak well with water.
- A mulch with horticultural grit will look attractive and help to prevent a ‘cap’ or crust forming on the top of the compost (something container plants can suffer due to the artificial nature of their watering).
How to care for Anisodontea
Pruning and Deadheading
Cut back in spring after the last risk of frost, down to a couple of pairs of leaves (or buds if these have dropped) on each stem.
Watering
Water until established (generally this means throughout the first growing season in the ground), after which this drought tolerant plant tends to be self-sufficient.
Container-grown anisodontea require regular watering throughout the growing season. Allow the top few centimetres of compost to dry out between soakings. Keep just moist throughout winter.
Cold Protection
Anisodontea grows best in a frost-free environment. In frost-prone gardens it is advisable to grow in a container to allow for overwintering indoors (a conservatory or greenhouse are both ideal).
Having said this, strong specimens with well-ripened wood have been known to withstand temperatures as low as -5°C. An insulating covering of fleece or hessian can be used to further increase chances of survival outdoors during cold snaps.
Pests and Diseases
Anisodontea tends to be trouble free, though like all members of the malvaceae family, can succumb to rust. This fungal disease causes spotting and discolouration of foliage, and in severe cases can stunt the growth of the plant.
A few simple steps can be taken to reduce the risk of this, such as not planting too densely, and minimising the presence of other malvaceae plants nearby (as above). If rust does arrive, remove and dispose of any affected leaves as soon as you can. Very heavily infected plants should be taken out altogether.
How to propagate Anisodontea
Anisodontea can be easily propagated by semi-ripe cuttings in summer, using the current year’s growth which by then will be firm and woody at the base while still soft and pliable at the tip.
- Find non-flowered shoots 5-10cm long and snip off the plant.
- Put them in a plastic bag straight away to prevent drying out.
- Fill a container with a compost mix which is at least 50% perlite (or if you prefer, as we do, 100% perlite).
- Trim the end of the cutting to just below a node (point at which leaves grow).
- Remove the lowest third of leaves.
- If the remaining leaves are large, cut them in half with a sharp knife (to reduce water lost through transpiration).
- Insert the cuttings into the compost and water lightly. Several cuttings can be put in the same container if there is enough space to do this without them touching.
- Place in a propagating unit with bottom heat if you have one, or covered with a plastic bag on a windowsill or in a greenhouse if not (out of direct sunlight).
- Keep the cuttings misted and occasionally watered until they root. You will know this has happened when roots emerge out of the bottom of the container.
- Gently remove rooted cuttings and pot them into individual pots. Grow on in a cool yet frost-free environment such as an unheated conservatory, greenhouse, or cold frame, until they are large enough to be planted out.
Common Anisodontea questions
- Is anisodontea hardy?
Anisodontea is classed as tender, and you are therefore advised to keep it frost free. However, it has been known in some cases to withstand temperatures as low as -5°C if the wood is sufficiently well-ripened. See ‘Cold Protection’ and ‘When and where to grow anisodontea’ for more information.