


How to grow Anemone
This member of the buttercup family comes in several forms and can be divided into two main groups – the smaller, spring flowering species which grow from tubers and rhizomes; and the taller, later flowering herbaceous species with fibrous roots, known as Japanese anemone (these are very different plants and not to be confused with one another!). The spring flowering species can be split further into woodland dwellers and sun-lovers. Such a range of diversity means there is an anemone to fit most garden situations – see below for a summary of each type.
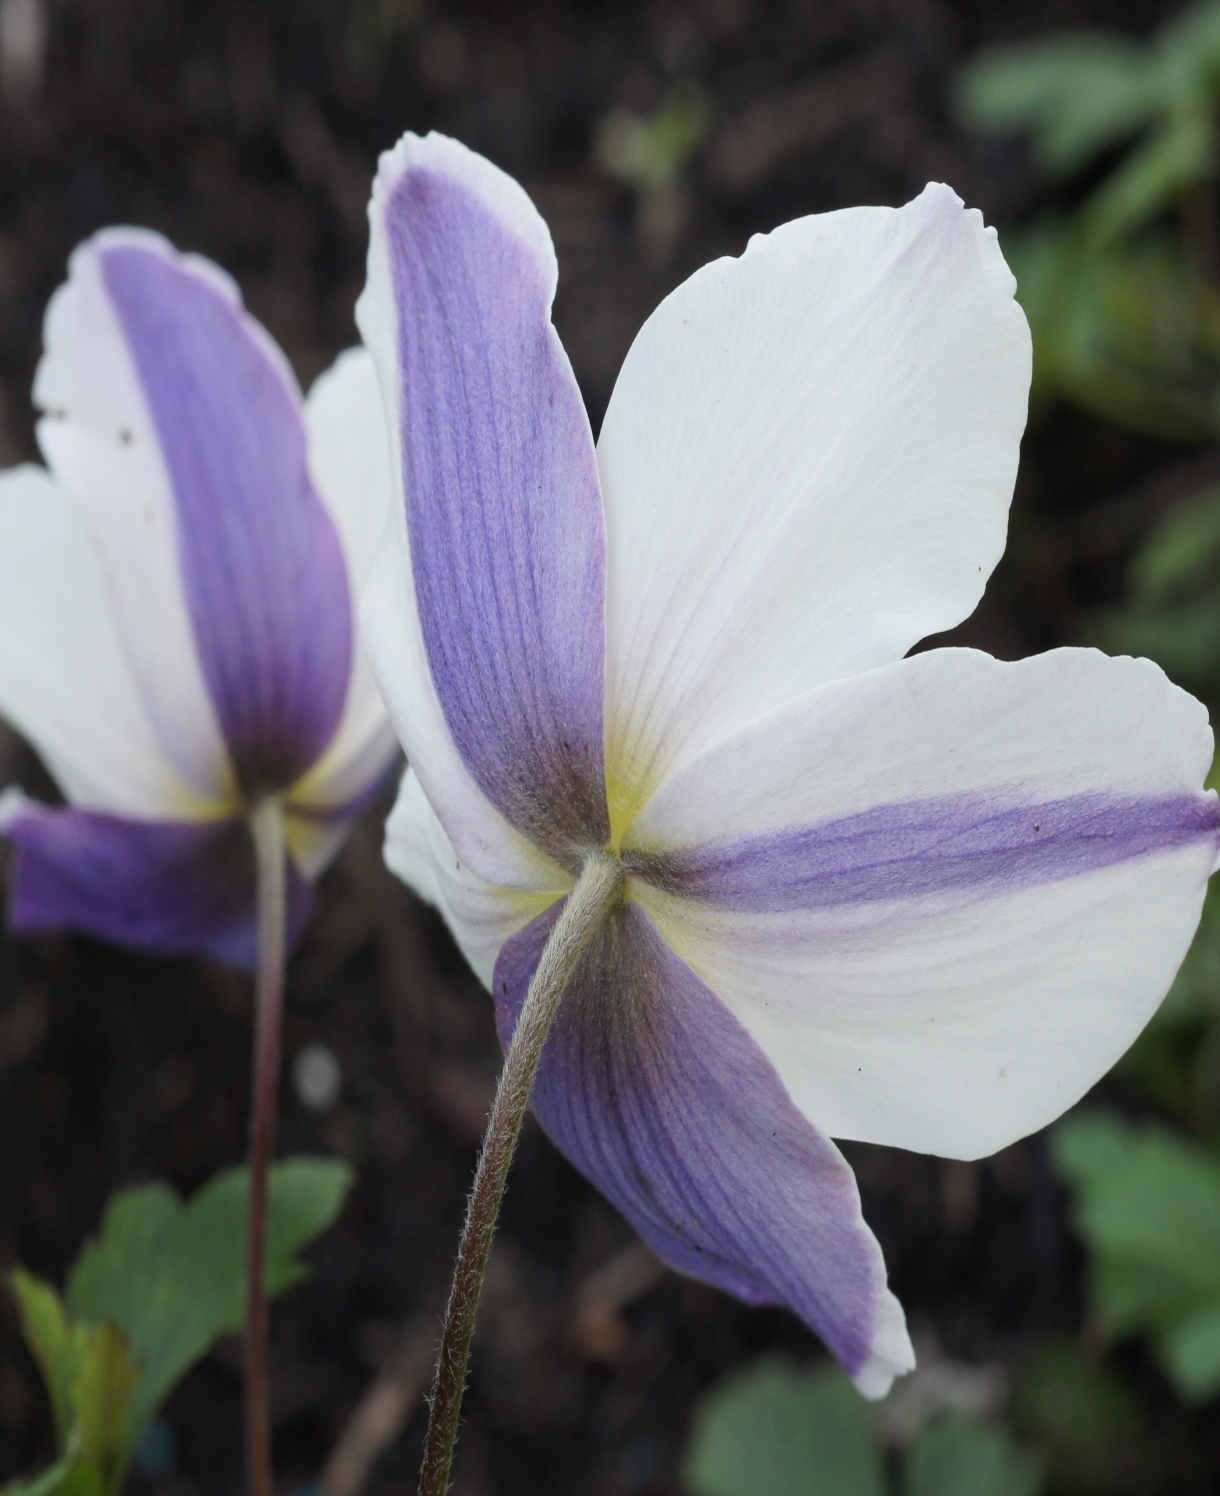
Also known as windflowers, anemones are grown for their open, saucer-shaped flowers offering an array of colours. They are all perennial, meaning they die back after flowering and reappear the following spring. For the spring flowering species this means they’re dormant throughout summer, autumn, and early winter. Japanese anemones are dormant in winter.

Key Information
Spring flowering – woodland
These are compact plants which naturalise to form carpets of what are often brightly coloured flowers. They thrive in dappled shade and are easy to grow in the UK. Examples include Anemone nemorosa (our native wood anemone), A. blanda, A. ranunculoides, A. apeninna, and A. x lipsiensis.
Position Dappled shade
Soil Moist and rich in organic matter in spring, drier during summer dormancy. The ground underneath deciduous trees and shrubs is ideal.
Flowering Period Spring
Hardiness Usually hardy throughout the UK, even in severe winters
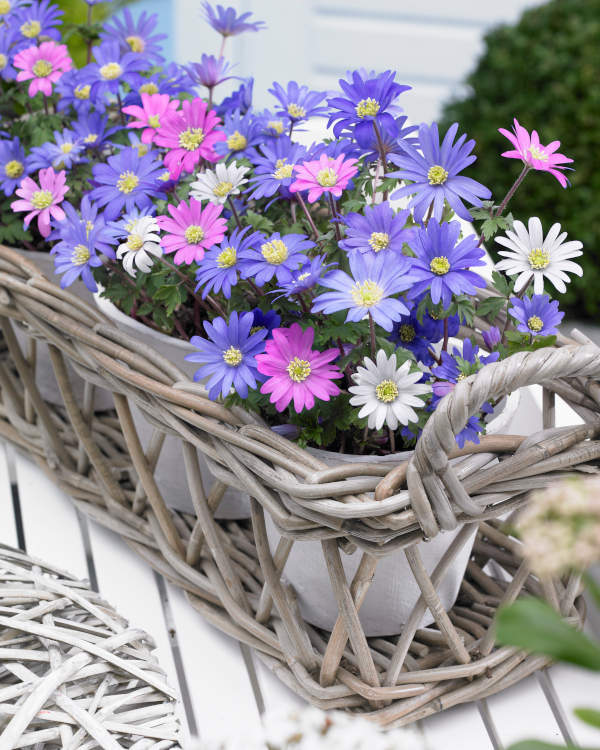
Spring flowering – sun-loving
These are showier, slightly taller plants which originate from the Mediterranean and alpine habitats. They work well in sunny, well-drained spots such as a south-facing border, gravel garden, or rockery. The most popular example of Mediterranean species is Anemone coronaria, especially the De Caen group, sometimes known as the florist’s anemone due to its suitability as a cut flower. A. pavonina is another.
The alpine species can be a little trickier to cultivate and tend to be grown mainly by specialists. These include A. biflora and A. bacharica.
Position A sunny, sheltered spot such as at the base of a south-facing wall
Soil Sandy and free draining. Avoid damp soil at all costs!
Flowering Period Spring
Hardiness While hardy, these species struggle with our UK rainfall in winter, so it’s usually best to offer some form of protection (see ‘Cold Protection’ section below)
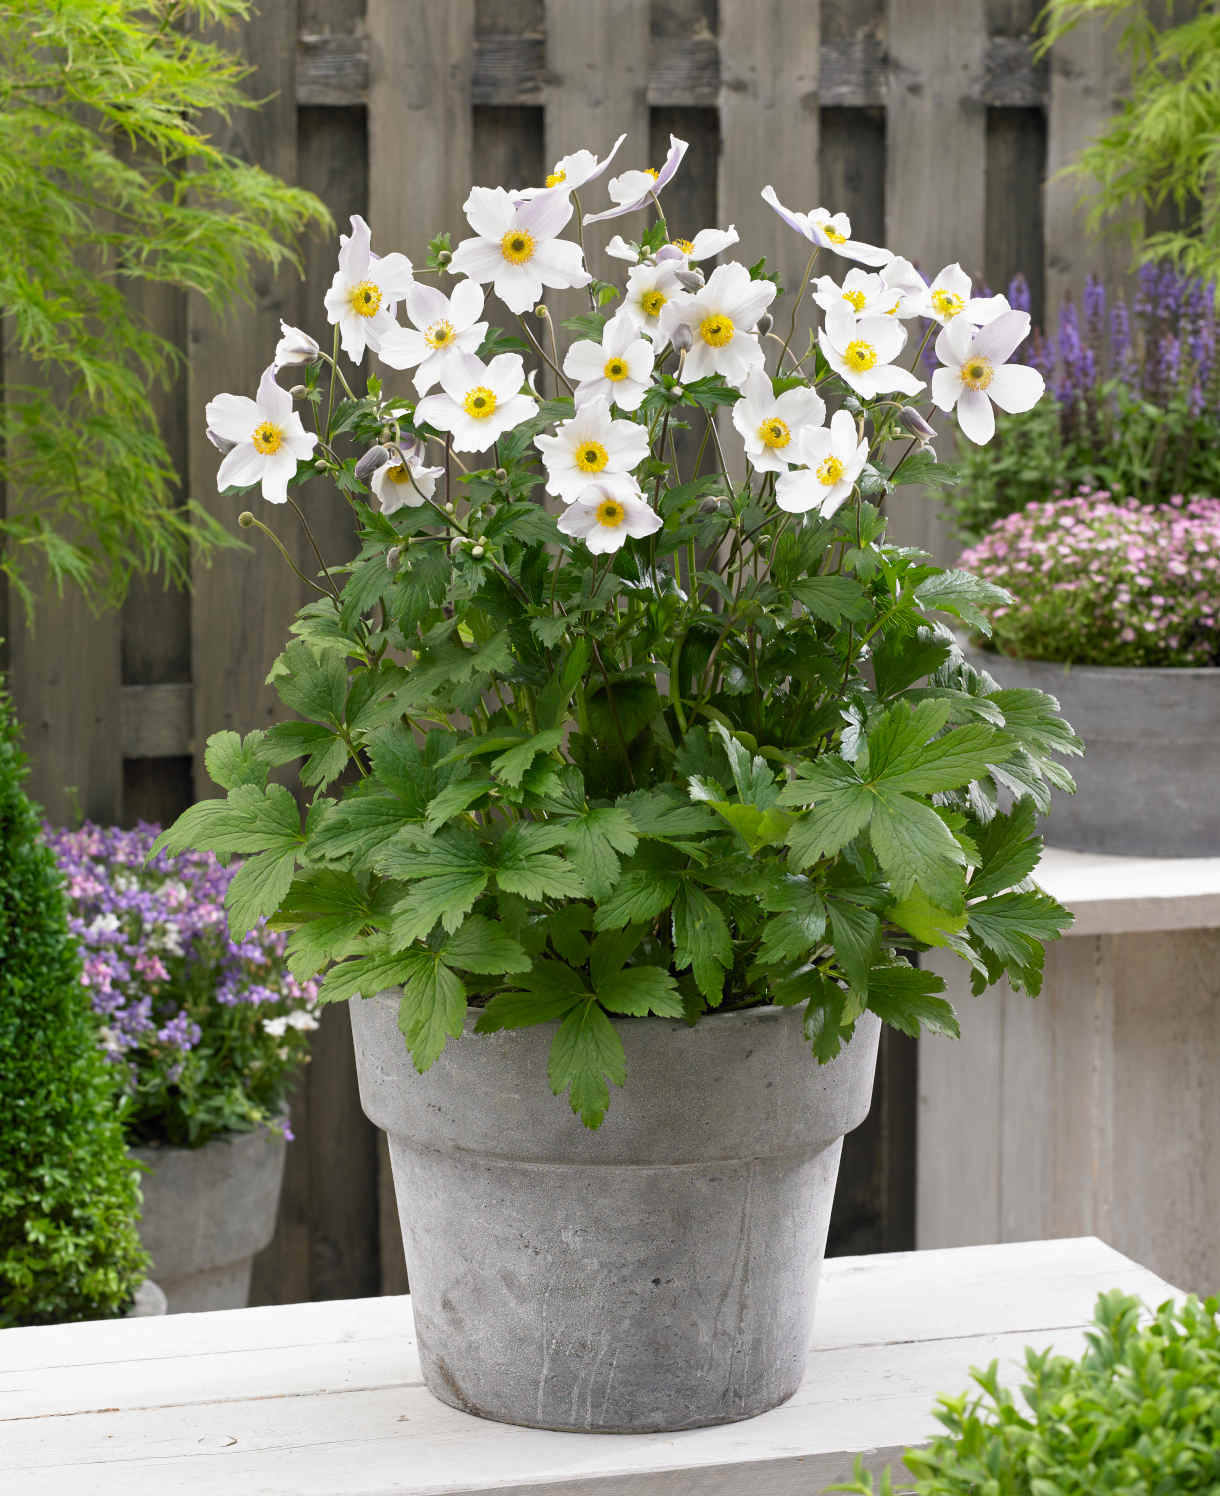
Japanese anemone
These tall, vigorous, spreading, border plants are valued for their late season flowers and easy adaptable nature. There are many cultivars available of two key species – Anemone x hybrida and A. huphensis.
Position Partial shade is best, though full sun is fine as long as the soil doesn’t dry out
Soil Any rich soil, avoiding the extremes of very wet and very dry
Flowering Period Late summer to autumn
Hardiness Extremely hardy (-20°C and beyond)
Soil pH

Position
Hardiness

Where & when to plant Anemone
Plant bare tubers or rhizomes of woodland species in autumn. Those of sun-loving species can be treated with a degree of flexibility depending on when you want blooming. An April planting will give you flowers in summer, whereas doing so in June provides early autumn flowers. If you’re feeling really organised, do both for an extended display. Anemone sold pre-potted in containers are best planted just as they come into growth in spring.
Japanese anemones can be planted in either autumn or spring – an autumn planting can be done by those gardening in mild conditions (and broadly speaking, this is the southern half of the UK). For those liable to cold winters, it is best to wait until spring (generally the northern half of the UK). Planting can also be carried out in summer, though be prepared to water regularly.
All anemones can be grown both in the open ground and in containers. It is worth noting that Japanese anemone can spread quite vigorously, so it best to avoid planting it where this may be a problem. It can also be difficult to remove from an area once established (any small piece of root left in the ground will regrow), so be sure to choose your spot wisely the first time!
How to plant Anemone
- For planting in the garden, dig the soil area removing any large stones and weeds and breaking up any lumps. It can be a good idea to mix in some organic matter such as manure or garden compost at this stage.
- Rake level and firm with your heels. Rake level again.
- Water plants well and allow to drain before planting.
- Dig a hole twice the size of the root-ball.
- Place the plant in the hole, ensuring the top of the root ball sits level with the surface of the soil. Too low and the plant may rot, too high and the roots can dry out.
- Backfill with soil and firm in gently with your foot.
- Soak well with water.
- Mulch around the base with well-rotted organic matter.
- For planting in containers, first choose an appropriately sized pot. The best practice is to start just a few centimetres larger than the rootball and increase in size every year or two. Always ensure there are plenty of drainage holes in the bottom.
- If you are using a large or heavy pot, it can be a good idea to fill and plant it in situ to save yourself the trouble of moving once full.
- Use a good quality potting compost with some horticultural grit mixed in and, if not already present (check the labelling on the bag) some slow-release fertiliser granules.
- Start by partially filling the pot with compost; enough so that when placed on it the upper surface of the root ball is about 3cm lower than the top of the pot.
- Fill around the plant with compost, firming down with your fingers then adding a little more so it is held tight.
- Pick up the container (if you can!) and lightly tap on the potting bench or ground a few times to help further settle the compost around the plant.
- Soak well with water.
- A mulch with horticultural grit will look attractive and help to prevent a ‘cap’ or crust forming on the top of the compost (something container plants can suffer due to the artificial nature of their watering).
Bare tubers and rhizomes
Soak tubers or rhizomes overnight or for a minimum of 10 hours prior to planting. This is to rehydrate them and encourage a quick return to growth.
- For planting in the garden, dig the soil area removing any large stones and weeds and breaking up any lumps. It can be a good idea to mix in some organic matter such as manureor garden compost at this stage.
- Rake level and firm with your heels. Rake level again.
- Plant tubers and rhizomes 5-8cm below the surface of the soil. It’s not obvious which way is up, but don’t worry about this – the leaves will find their way to the surface regardless. Aim for a spacing of 10-15cm.
- Soak well with water.
- Mulch with well-rotted organic matter.
- For planting in containers, first choose an appropriately sized pot with plenty of drainage holes in the bottom. You can space tubers and rhizomes slightly closer together in a pot than in the open ground.
- If you are using a large or heavy pot, it can be a good idea to fill and plant it in situ to save yourself the trouble of moving once full.
- Use a good quality potting compost with some horticultural grit mixed in (extra for Mediterranean or alpine species – aim for at least 30% grit) and, if not already present (check the labelling on the bag) some slow-release fertiliser granules.
- Partially fill the container with compost, planting the anemones at a depth of 5-8cm and spacing of 5-10cm. Again, but don’t worry about which way is up (it’s hard to tell with anemones) – the leaves will find their way to the surface.
- Cover with more compost, stopping a few centimetres below the top of the container.
- Pick up the container (if you can!) and lightly tap on the potting bench or ground a few times to help further settle the compost around the plant.
- Soak well with water.
- A mulch with horticultural grit will look attractive and help to prevent a ‘cap’ or crust forming on the top of the compost (something container plants can suffer due to the artificial nature of their watering).
What to plant with Anemone
Spring flowering – woodland
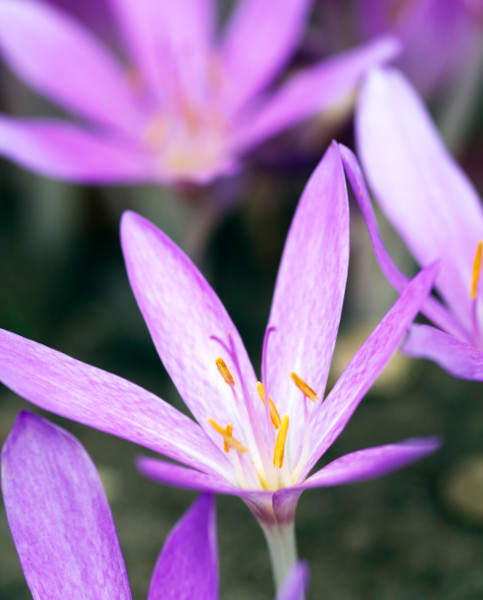
Combine this dainty, jewel-like spring plant with similarly early-blooming companions to carpet the ground beneath bare trees and shrubs. We suggest muscari, crocus, snowdrops, cyclamen, and chionodoxa.
Spring flowering – sun-loving
This type of anemone demands a high-profile spot alongside other showy stars of spring such as tulips, daffodils, and hyacinths.
Japanese anemone
There’s little point planting Japanese anemone alongside anything that can’t hold its own. We recommend other classic vigorous spreaders with good garden value, such as Alchemilla mollis, Erigeron karvinskianus, and Persicaria amplexicaulis.

How to care for Anemone
Pruning and Deadheading
No pruning is required for spring flowering species, though you may wish to tidy away spent foliage and flowers.
For Japanese anemone, try to resist the urge to cut plants back in late autumn as they provide valuable cover to overwintering insects and animals. Wait until early spring just before new growth starts, cutting dead foliage and stems out at the base. Where established clumps are becoming too large, lift and divide in late autumn or early spring (see ‘How to propagate anemone’ section below).
Watering
All anemones need a good initial soaking on planting, followed by a few more throughout the first few weeks in the ground. Take care not to overdo it – spring flowering species in particular resent sitting in damp soil. Aim to water well and occasionally rather than little or often, allowing the top few centimetres of soil to dry out between soakings. To check this, wiggle your finger down into the soil until you hit a cool, moist bit.
After this initial period, spring flowering species should need watering only in prolonged spells of hot, dry weather. Japanese anemones, on the other hand, will thank you for keeping up with watering until the end of their first growing season. From year two onwards, they’ll be as self-sufficient as the spring flowering species.
Container-grown anemone have less access to moisture so need regularly watering throughout every growing season. Again, allowing the top couple of centimetres of compost to dry out between watering helps avoid overwatering. When the plants die back and enter dormancy, scale the watering right back to just enough to keep the compost from drying out completely.
Feeding
On healthy, fertile soil, a mulch of well-rotted organic matter (i.e., a layer of leaf mould, manure, or garden compost applied to the soil around the plant) should provide enough nutrients for your anemone. This has the added benefit of suppressing weeds and locking in moisture. Mulch when planting, and then again each spring.
If you garden on poor soil or your anemone looks in need of a boost, applying a general-purpose granular feed to the surface of the soil and lightly working in can reap benefits. This is known as a top dress and should be done to coincide with mulching in spring – first apply the feed, then cover with the mulch.
Container-grown plants are different as they rely solely on the gardener for nutrition. Get off to a flying start by making sure you use a good quality potting compost with slow-release granules mixed in. These generally provide nutrients for around 6 to 8 weeks, after which you’ll need to apply a balanced liquid feed every 2-3 weeks until the end of the growing season.
Cold Protection
Most species of anemone can withstand a UK weather without the need for additional protection.
The exception to this is sun-loving spring flowering species such as Anemone coronaria, which strongly resent excessive rainfall during winter. If you garden on very light, sandy soil you may get away with leaving these in the ground with a protective dry mulch such as straw, bracken, or bark chippings to deflect the rain. Otherwise, either lift and store somewhere cool and dry over winter, or grow in containers so you can move them to a protected environment during the wettest months. A greenhouse, conservatory, or porch are all ideal.
Pests and Diseases
Anemones are usually healthy, problem-free plants when grown in the right conditions. Issues such as powdery mildew can occur if plants become too dry during the growing season, and leaf spot may appear when plants are stressed – perhaps by insufficient light levels, air flow (i.e., planted too closely together), or overly damp growing conditions.
The best form of defence is to choose your planting spot wisely to match the requirements of the species you are growing. If the problems above do occur, prune off and dispose of all affected leaves and try to address the cause of plant stress. For powdery mildew this can be as simple as giving plants a good, thorough soak with water. For leaf spot caused by insufficient light levels, airflow, or drainage, consider relocating plants to a better position. This is best done after the leaves have died down for spring flowering species, and late autumn or early spring for fibrous-rooted Japanese anemone species.
It's also a good idea to maintain good garden hygiene by clearing away waste plant material.
How to propagate Anemone
The quickest and easiest way to propagate anemone is through lifting and dividing. For Japanese anemones not only is this a way of producing more plants but also an effective method of controlling spread, recommended as a routine maintenance practice every three to four years.
Spring flowering species
- Dig up established tubers and rhizomes once the leaves have died down.
- Cut each into several sections, making sure each has a growing point (bud).
- Pot up immediately (you don’t want to let them dry out) into individual containers filled with a free-draining compost mix.
- Grow on until large enough to be planted out as per above. Expect flowers the following year.
Japanese anemone
- Choose a day in late autumn or early spring when the soil is not frozen or waterlogged.
- Dig the plant out of the ground.
- Shake off any excess soil.
- Separate the plant into sections using either swift, cutting blows with a sharp spade, or two forks inserted back-to-back with tines touching, handles then pushed together to prise the plant apart.
- Discard old, damaged or surplus pieces, keeping healthy, vigorous material.
- Dig over entire area, removing as many roots as possible (these are likely to reshoot).
- Replant or pot up selected pieces as required.
* Many plants carry Plant Breeders Rights and cannot be propagated for commercial purposes.
Common Anemone questions
- What are the pros and cons of bare tubers and rhizomes versus pot-grown plants?
Bare tubers and rhizomes offer the greatest cost efficiency, though require a little extra knowledge in terms of pre-soaking and getting the planting depth and time right. Pot-grown versions are a little easier – simply pop them in the ground when they arrive. - My spring flowering anemones haven’t grown. What’s the problem?
This might be because you didn’t soak them overnight (for at least 10 hours) prior to planting or potting. The tubers and rhizomes tend to dry out in transit and so need this rehydration to kickstart them back into growth.