


How to grow Anchusa
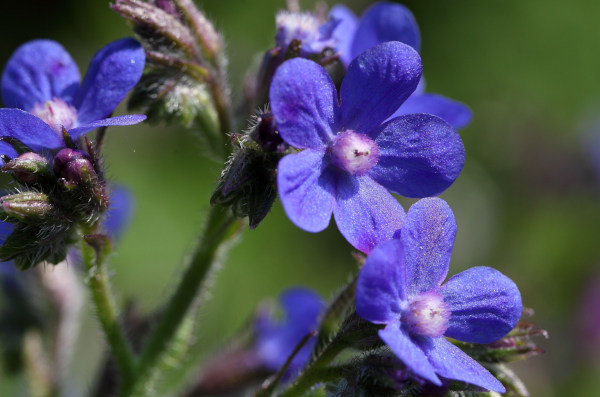
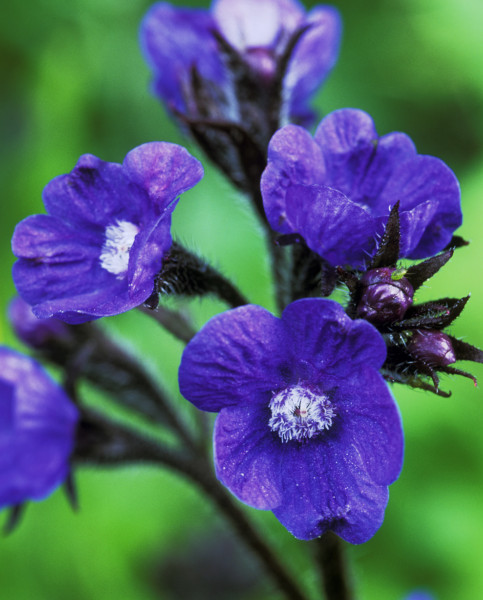
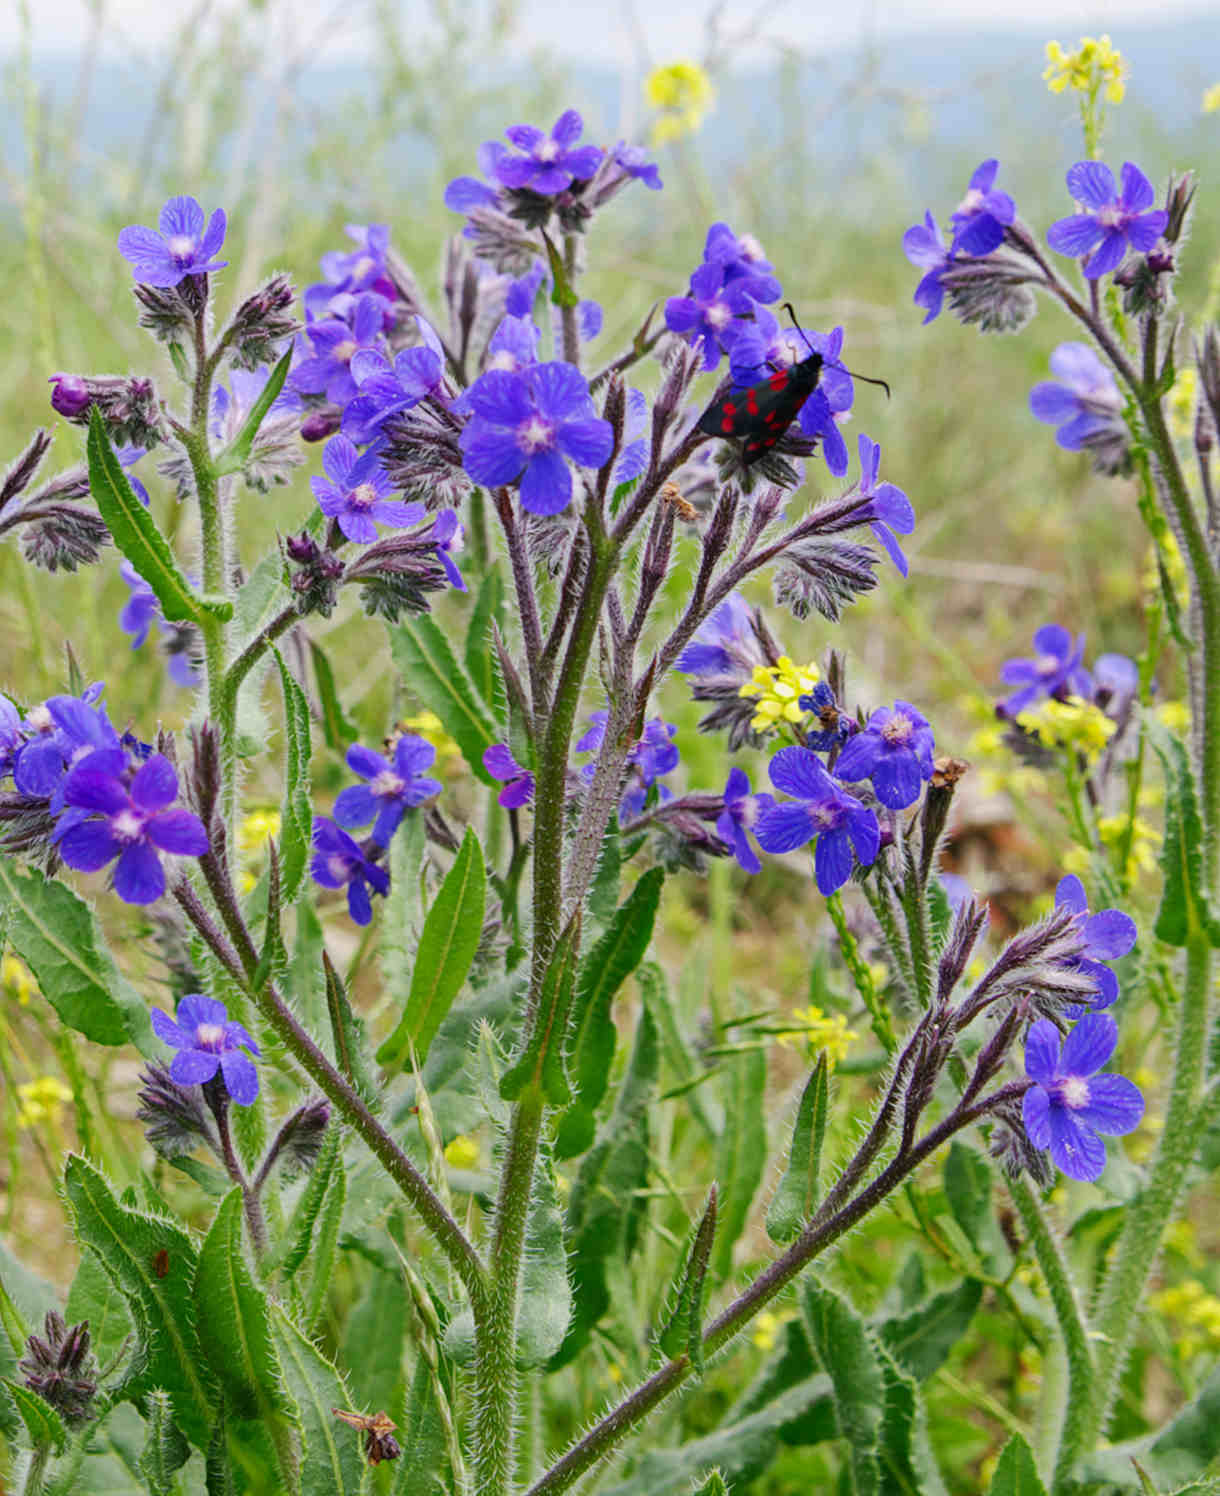
Also known as bugloss or alkanet, several species of this borage family member are considered to have good garden value due to their bright, vivid blue flowers. From dwarf, alpine species (e.g., Anchusa cespitosa), to tall and statuesque border perennials (mainly A. azurea and its cultivars), and low-growing annuals (A. capensis), the genus offers its signature splash of blue in a varied and diverse range of forms.
Key Information
Soil pH

Position
Hardiness

Where to plant Anchusa
Anchusa is usually sold either as bare roots during dormancy, or as potted plants from late spring.
Plant bareroots straight into the ground on arrival, or, in the event of frozen or very wet weather, temporarily pot into a container of damp compost so you can wait for better conditions.
Potted plants can be planted out at any time during the growing season, though for best results aim for spring or autumn. An autumn planting can be done by those gardening in mild conditions (and broadly speaking, this is the southern half of the UK). For those liable to cold winters, it is best to wait until spring (generally the northern half of the UK). Planting can also be carried out in summer, though be prepared to water regularly.
Plant tall border perennial species in the middle to back of a border. Alpine species suit sharply drained spots such as rockeries or troughs filled with a gritty mix. Annual bedding species can be used to fill gaps in the border or dazzle in seasonal container displays.
It is worth noting at this point the importance of choosing a spot for perennial species wisely. These will regrow from even the smallest fragment of root, which is great news when you’re taking root cuttings, though not so good when you’re attempting to remove the plant! Getting the location right first-time round can save lots of work later.
How to plant Anchusa
- For planting in the garden, dig the soil area removing any large stones and weeds and breaking up any lumps. For border perennials and annuals, mix in some organic matter such as manure or garden compost. Alpine species will need plenty of grit or sharp sand.
- Rake level and firm with your heels. Rake level again.
- Water plants well and allow to drain before planting.
- A good tip is to dig a hole twice the size of the root-ball. Fill with water and allow to drain before placing in the plant.
- Place the plant in the hole, ensuring the top of the root ball sits level with the surface of the soil. Too low and the plant may rot, too high and the roots can dry out.
- Backfill with soil and firm in gently with your foot.
- Soak well with water.
- Mulch around the base with well-rotted organic matter for border perennials and annuals, horticultural grit for alpine species.
- For planting in containers, first choose an appropriately sized pot. You may wish to grow your anchusa on its own in a pot, or as part of a larger, mixed container display. Either way, ensure there are plenty of drainage holes in the bottom.
- If you are using a large or heavy pot, it can be a good idea to fill and plant it in situ to save yourself the trouble of moving once full.
- Use a good quality potting compost with some horticultural grit mixed in (at least 20-30% for alpine species) and, if not already present (check the labelling on the bag) some slow-release fertiliser granules.
- Start by partially filling the pot with compost; enough so that when placed on it the upper surface of the root ball is about 3cm lower than the top of the pot.
- Fill around the plant with compost, firming down with your fingers then adding a little more so it is held tight.
- Pick up the container (if you can!) and lightly tap on the potting bench or ground a few times to help further settle the compost around the plant.
- Soak well with water.
- A mulch with horticultural grit will look attractive and help to prevent a ‘cap’ or crust forming on the top of the compost (something container plants can suffer due to the artificial nature of their watering).
How to care for Anchusa
Pruning and Deadheading
Cut back flowering stems once they finish to encourage a second flush.
Do this again later in the summer to prevent seed production and direct energy into the overwintering basal rosettes to power better, taller flowers next year.
Taller species and cultivars may need staking, particularly if grown in a windy spot. A network of branches inserted into the ground surrounding the plant and twisted or woven together works well, as do metal link stakes.
Watering
Anchusa should be regularly watered during its first growing season in the ground, after which it should need watering only in very hot, dry weather.
Container-grown anchusa has less access to moisture so needs regularly watering throughout every growing season. Allowing the top few centimetres of compost to dry out between soakings is a good rule of thumb, being aware that in the height of summer this can be as often as every day. To check, wiggle your finger down until you hit moisture. From mid-autumn, the British climate tends to take over watering needs, though do remember to step in in the event of an unseasonably dry spell.
Feeding
On healthy, fertile soil, an annual mulch of well-rotted organic matter (i.e., a layer of manure or garden compost applied to the soil around the plant) should provide more than enough nutrients to keep your anchusa going. This has the added benefit of suppressing weeds and locking in moisture. Autumn or spring are the best times to mulch.
Container-grown plants are different, as they rely solely on the gardener for nutrition. Get off to a flying start by making sure you use a good quality compost, then throughout the growing season (March to September) apply a fortnightly liquid feed.
Cold Protection
Anchusa is hardy and can be expected to survive a UK winter without the need for additional protection.
Pests and Diseases
Anchusa is generally problem-free, apart from one fungal disease known as powdery mildew. This appears as a white, powder-like coating on foliage and is generally a sign that the plant is stressed – usually through lack of water, though other causes can include poor airflow, over fertilizing, and insufficient sunlight.
Prune off and dispose of any affected leaves and if necessary, keep well-watered, and thin out surrounding plants to improve airflow and light levels. Do not be tempted to give the plant extra feed, as this will generate an excess of soft, new growth which is particularly susceptible to the fungus.
How to propagate Anchusa
Perennial species can be propagated very easily by root cuttings taken in winter.
- Dig up a healthy, vigorous clump and wash the roots in water.
- Select pencil thick roots, severing close to the crown with a sharp knife or secateurs.
- Remove no more than a third of the roots and replant the clump as soon as possible.
- Trim off the thin end of each root, along with any fibrous side roots.
- Cut into 5cm lengths, using an angled cut at the bottom so you know which way is up!
- Fill a container with a grit or perlite-heavy compost mix.
- Insert the root cuttings, angled side down, pushing them down so that the horizontal top end sits just below the surface of the compost.
- Cover with about 1cm of horticultural grit.
- Place in a coldframe, unheated greenhouse, or on a cool windowsill and water in lightly.
- Expect to see signs of life the following spring, at which point you can pot each cutting into individual 9cm pots. Grow on until the plants are large enough to be planted out the following year.
Alpine species can be propagated by seed collected in late summer and sown in late winter to early spring.
- Seeds are typically ready for collecting in late summer when the seedheads have dried and turned brown.
- Snip the seedheads from the plant using scissors or secateurs. Try to do this in dry conditions, and place in a small, labelled paper bag or envelope. Store somewhere cool and dry until it is time to sow.
- In early spring, fill a seed tray or small pot with a very well-draining compost mix, compressing the surface lightly with a flat piece of wood or the bottom of another pot.
- Sprinkle the seeds evenly over the surface of the compost.
- Use a garden sieve to cover with a fine layer of compost.
- Water the soil gently with a fine spray until it is evenly moist but not waterlogged.
- Place the seed tray or pots in a propagating unit, heated greenhouse, or on a sunny windowsill. If the latter, covering with a clear plastic lid or clingfilm will speed germination by creating a mini-greenhouse effect. Remove this once you notice seedlings emerge.
- When the seedlings have grown large enough to handle, transplant them into module trays or individual 9cm pots filled with a well-draining mix and continue to grow on in a warm, protected environment.
- Keep barely moist, never soggy.
- Plant out in late spring to early summer, following our ‘How to plant anchusa’ section above.
* Many plants carry Plant Breeders Rights and cannot be propagated for commercial purposes.
Common anchusa questions
Where should I plant anchusa?
Many of the perennial and annual species make great border plants, where their gentian blue blooms complement a wide range of planting styles and colours. Perennial species can be difficult to eradicate once established, so choose your spot wisely!
Alpine species prefer very free-draining spot such as a rockery or container filled with a gritty mix.
How long will anchusa live for?
Annuals last for just one year and need replacing each spring. Perennial anchusa last longer though can be relatively short-lived – expect to be replacing them every four years or so. Taking root cuttings in the second year (as above in our ‘How to propagate anchusa’ section) is a good idea to maintain stocks.