


How to grow Anagallis
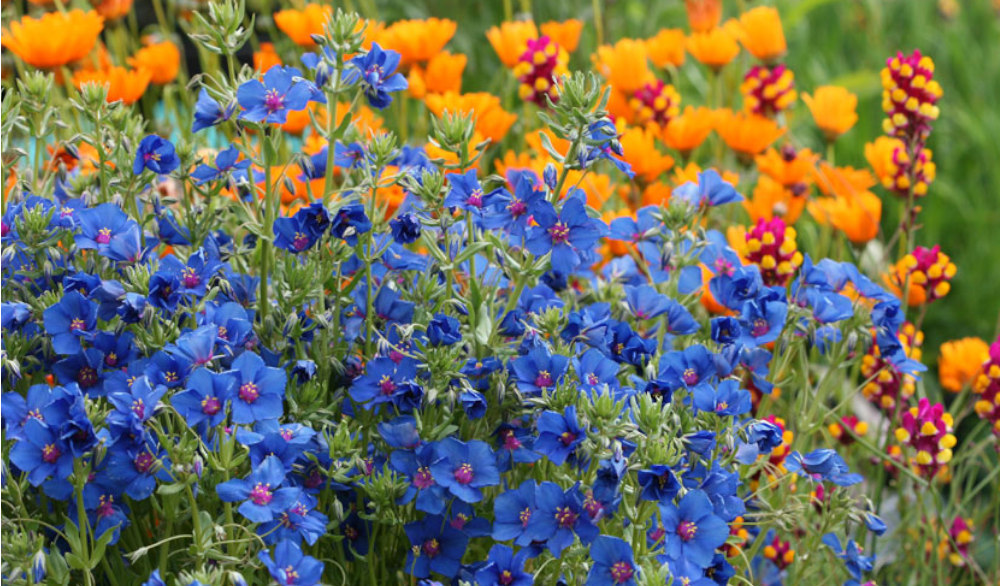
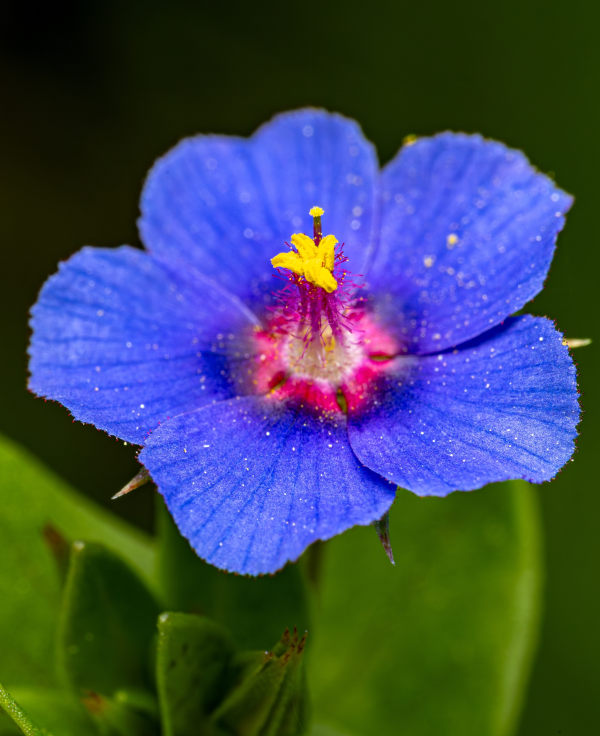
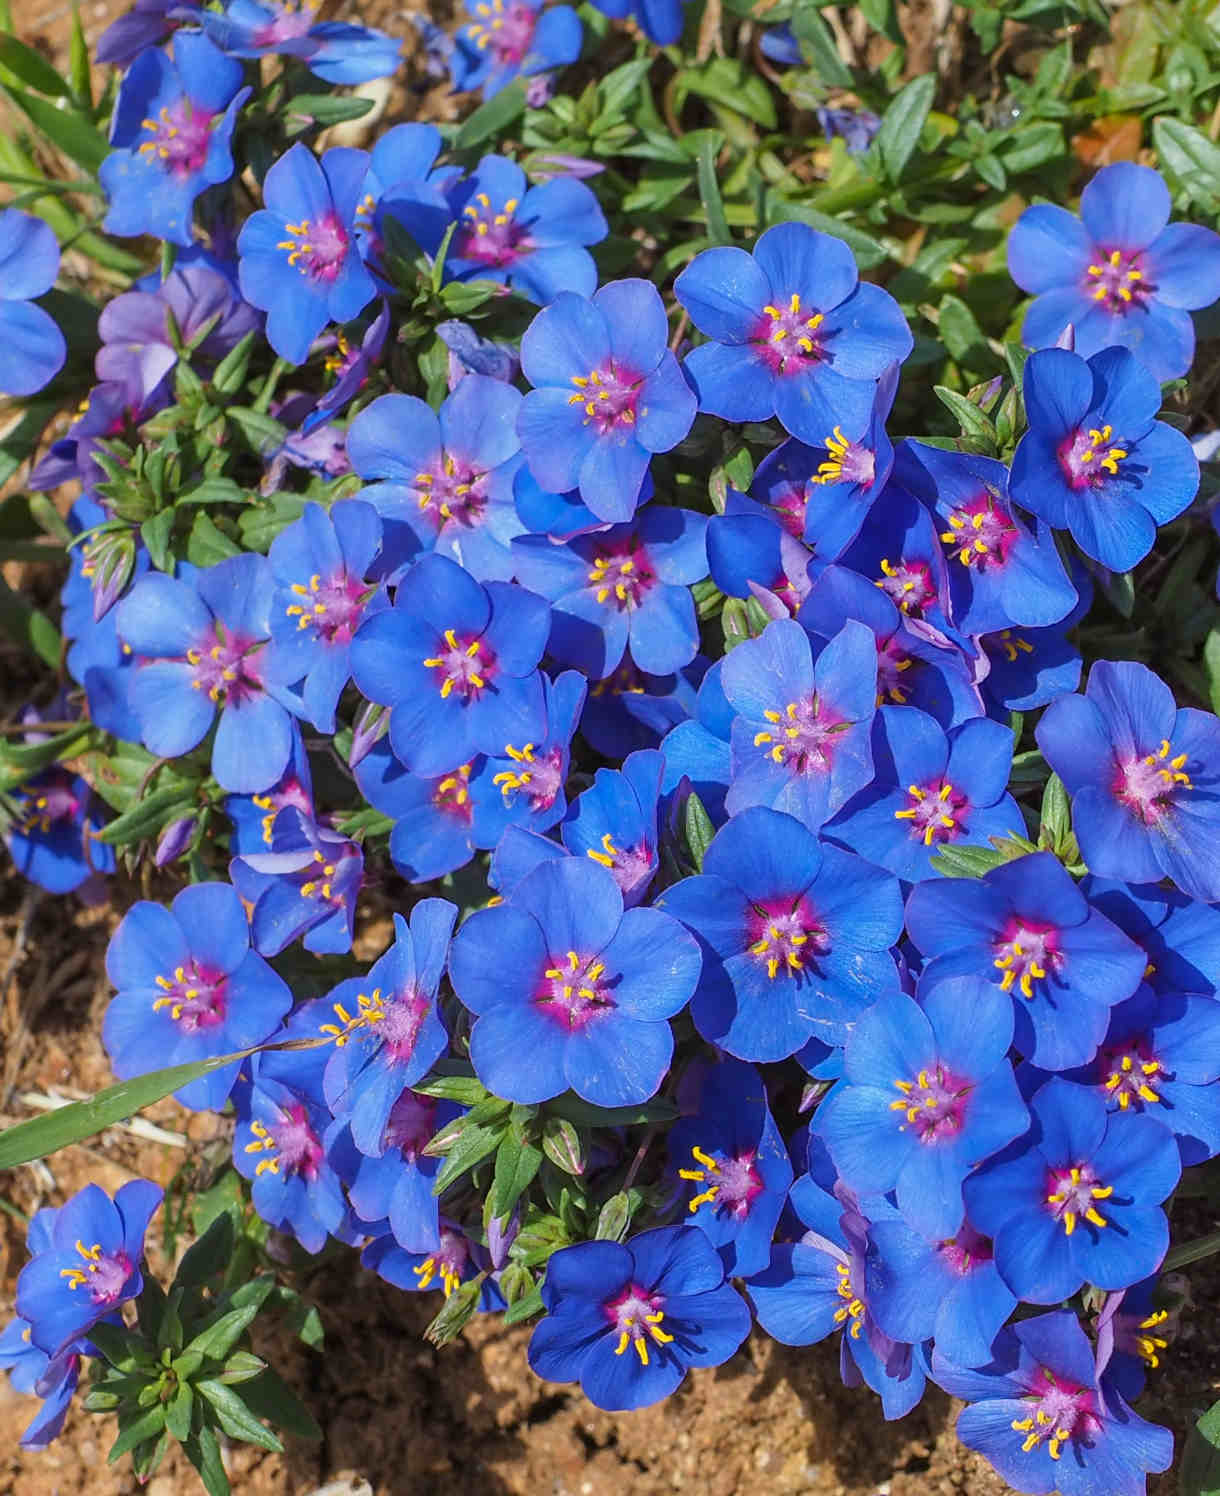
Also known as pimpernel, this low-growing member of the primrose family consists of around 20 species of annuals and evergreen perennials. Most popular among gardeners is Anagallis monellii (blue pimpernel) and its cultivars – a Mediterranean species widely considered to offer the best blue of any garden flowers (though red and pink varieties are also available). With a neat, creeping, fast-growing habit, and very long flowering period, it makes an excellent cascading or spreading bedding plant. While technically perennial, a tender hardiness rating means it is usually treated as an annual in the UK.
Other species you may be familiar with include two hardy British native wildflowers. A. arvensis (scarlet pimpernel) is an annual found growing in arable fields and road verges, and A. tenella (bog pimpernel) is a perennial, native to damp, boggy places. This growing guide will focus on the cultivation needs of A. monellii and its cultivars.
Key Information
Soil pH

Position
Hardiness

Where to plant Anagallis
Plant your anagallis outside once all risk of frost has passed in your area. This can vary depending on the region, though is usually around late May. If your young plants arrive before it is safe to plant them out, pot into 9cm containers using a well-draining compost mix and keep in a frost-free environment such as a greenhouse, conservatory, or sunny windowsill. Keep regularly watered but not soggy.
When the time comes to move your anagallis plants outside, they are well-suited to containers and hanging baskets, where their creeping stems will cascade over the edge. Alternatively, use them to cover ground at the front of a border or lining a path or wall edge.
How to plant Anagallis
- For planting in containers, first choose an appropriately sized pot. You may wish to grow your anagallis on its own in a pot, or as part of a larger, mixed container display. Either way, ensure there are plenty of drainage holes in the bottom.
- If you are using a large or heavy pot, it can be a good idea to fill and plant it in situ to save yourself the trouble of moving once full.
- Use a good quality potting compost with some horticultural grit mixed in and, if not already present (check the labelling on the bag) some slow-release fertiliser granules.
- Start by partially filling the pot with compost; enough so that when placed on it the upper surface of the root ball is about 3cm lower than the top of the pot.
- Fill around the plant with compost, firming down with your fingers then adding a little more so it is held tight.
- Pick up the container and lightly tap on the potting bench or ground a few times to help further settle the compost around the plant.
- Soak well with water.
- A mulch with horticultural grit will look attractive and help to prevent a ‘cap’ or crust forming on the top of the compost (something container plants can suffer due to the artificial nature of their watering).
- For planting in the garden, dig the soil area removing any large stones and weeds and breaking up any lumps. Mix in some organic matter such as manure or garden compost. If your soil is on the heavy side, now is also the time to add a generous helping of horticultural grit. Rake level and firm with your heels. Rake level again.
- Water plants well and allow to drain before planting.
- A good tip is to dig a hole twice the size of the root-ball. Fill with water and allow to drain before placing in the plant.
- Place the plant in the hole, ensuring the top of the root ball sits level with the surface of the soil. Too low and the plant may rot, too high and the roots can dry out.
- Backfill with soil and firm in gently with your foot.
- Soak well with water.
- Mulch around the base with well-rotted organic matter.
How to care for Anagallis
Pruning and Deadheading
Anagallis is considered a low-maintenance plant and does not require deadheading.
If, like most UK gardeners, you are treating yours as annual bedding, simply remove to the compost heap at the end of the growing season.
Alternatively, if you’d like to try and keep your plants going for another year, cut back after flowering and overwinter as described below in our ‘Cold protection’ section.
Watering
Anagallis grown in containers require regular watering as they can dry out very quickly, particularly in warm weather. To avoid overwatering (it’s especially important not to do this in the first few weeks for this plant), a good rule of thumb is to allow the top couple of centimetres to dry out between soakings. To check this, wiggle your finger down into the soil/ compost until you feel moisture. Be aware that containers can need watering as often as once a day during the height of summer.
Anagallis in the ground should be watered regularly for the first few weeks, and then in hot, dry weather after this. Aim for consistently moist but not soggy soil – again, use the finger check technique described above.
Feeding
To get the most out of hungry bedding plants such as anagallis, regular feeding is a must – particularly for those grown in a container.
In a container, anagallis should be potted in a good quality compost with slow-release fertiliser granules mixed in, then fed with a high potassium liquid feed, such as tomato feed, at fortnightly intervals throughout the growing season to boost flowering.
In the open ground, mulch newly planted anagallis with well-rotted organic matter, i.e., a layer of manure or garden compost applied to the soil around the plant. As well as boosting the nutrient content of the soil, this has the added benefit of suppressing weeds and locking in moisture.
After this, a fortnightly application of high potassium liquid feed, such as tomato feed, will boost performance significantly.
Cold Protection
- monellii is a tender species, which means it is unable to survive temperatures below the 1°C to 5°C range. Because of this, it tends to be treated as an annual in the UK.
If you would like to try to keep yours going for another year, cut back after flowering then move to a protected, frost-free environment such as a heated greenhouse, conservatory, or warm, sunny porch (suitable for container-grown anagallis only). Keep the compost barely moist until the following spring when watering can be resumed as above. Move outside once all risk of frost has passed.
Pests and Diseases
Anagallis is largely problem-free, though you may occasionally see aphids take up residence. While unsightly, these are part of a balanced garden ecosystem, and the best approach is to leave them to their natural predators (e.g. birds, ladybirds, wasps, frogs). When numbers are so large, however, that their feeding starts to inhibit and disfigure growth, you may feel it necessary to act. Regularly blasting off with a hose or wiping away with a cloth or piece of kitchen paper can help to keep numbers down without harming beneficial organisms.
How to propagate Anagallis
- monellii and its cultivars can be propagated by soft tip cuttings in spring or early summer.
- Find non-flowered shoots 5-10cm long and snip off the plant.
- Put them in a plastic bag straight away to prevent drying out.
- Fill a container with a compost mix which is at least 50% perlite (or if you prefer, as we do, 100% perlite).
- Trim the end of the cutting to just below a node (point at which leaves grow).
- Remove the lowest third of leaves.
- Nip off the soft tip.
- Insert the cuttings into the compost and water lightly. Several cuttings can be put in the same container if there is enough space to do this without them touching.
- Place in a propagating unit with bottom heat if you have one or covered with a plastic bag on a windowsill or in a greenhouse if not (out of direct sunlight).
- Keep the cuttings misted and occasionally watered until they root. You will know this has happened when roots emerge out of the bottom of the container – expect it to take 2-4 weeks.
- Harden off the cuttings by taking them out of the propagating unit or removing the plastic bag, and leaving uncovered like this for a couple of weeks.
- Gently remove rooted cuttings and pot them into individual pots. Grow on in a warm, frost-free environment such as a conservatory, greenhouse, or sunny windowsill, until it is safe to plant them out the following May.
* Many plants carry Plant Breeders Rights and cannot be propagated for commercial purposes.
Common Anagallis questions
- Is anagallis a perennial?
This depends on the species, as anagallis can be either annual or perennial. The species focussed on in this growing guide, Anagallis monellii, is technically a perennial, though its inability to survive a UK winter means it is usually treated as an annual here. - Can I overwinter Anagallis monellii in the ground?
Protecting plants with a dry mulch (e.g., bracken, straw, or bark chippings) may help them withstand a mild winter. A cloche is another option, though be aware that neither of these methods are likely to be successful in a very cold winter.