


How to grow Amelanchier
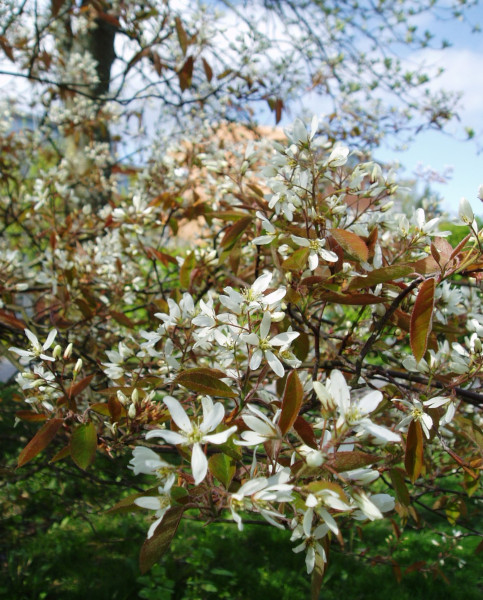
This member of the rose family contains around 25 species of deciduous trees and shrubs. Most widely grown by gardeners are the North American species, such as A. alnifolia (a suckering shrub also known as the Saskatoon berry), A. lamarkii (a small, upright-stemmed tree also known as juneberry or snowy mespilis), and the slightly smaller A. laevis (a small tree or large shrub known as the smooth serviceberry).
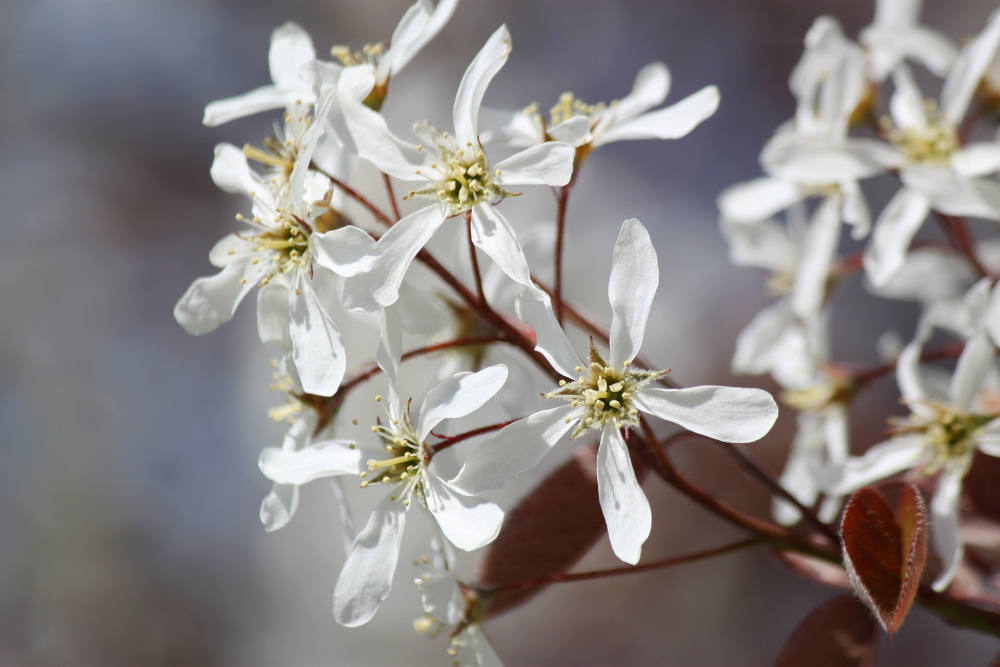
Amelanchier is valued for its mass of white, starry spring blossom, vivid autumn colour, and glossy fruit which is much loved by birds. Its manageable size makes it perfect for small gardens, and a tough, low maintenance habit has endeared it to gardeners around the world.
Key Information
Soil pH

Position
Hardiness


When and where to plant Amelanchier
Amelanchier are best planted in a well-drained soil of clay, sand or loam within an acidic or neutral PH balance. Only a few of the species are lime tolerant, but most will cope with light shade and neutral soil if necessary. They are best positioned in full sun or part shade as this will bring out the best foliage colour and best flower performance. Amelanchier make fantastic hedging and screening.
For best results, plant in autumn or spring. An autumn planting can be done by those gardening in mild conditions (and broadly speaking, this is the southern half of the UK). For those liable to cold winters, it is best to wait until spring (generally the northern half of the UK). Planting can also be carried out in summer, though be prepared to water regularly.
Amelanchier suits mixed or shrub borders or being grown as a specimen tree in a lawn. If you have the space, several planted together looks spectacular.
Amelanchier can also be grown in a (large) container.
Though partial shade will be tolerated, the best autumn colour is achieved in full sun.
How to plant Amelanchier
In the ground
- Clear the chosen area of weeds.
- Dig a planting hole several times larger than the root ball. Now is the time to give your soil a boost by adding well-rotted organic matter to the planting hole and mixing thoroughly.
- Place the plant in the hole, ensuring the top of the root ball sits level with the surface of the soil. Too low and the plant may rot, too high and the roots can dry out.
- Backfill with soil and firm in gently.
- Soak well with water.
- Mulch around the base with well-rotted organic matter.
In a container
- Choose an appropriate container (as deep as you can), ensuring there are plenty of drainage holes in the bottom.
- It can be a good idea to fill large pots in situ, to save yourself the trouble of moving once full.
- For best results use a good quality potting compost with a few handfuls of horticultural grit mixed in. If not already present in the compost, add some slow-release fertiliser granules.
- Start by partially filling the pot with compost; enough so that when placed on it the upper surface of the root ball is about 3cm lower than the top of the pot.
- Infill all the space surrounding the root ball with compost, firming down with your fingers then adding a little more so the plant is held tight.
- Pick up the pot and lightly tap on the potting bench or ground a few times to help further settle the compost around the plant.
- Soak well with water.
- A mulch with horticultural grit will look attractive and help to prevent a ‘cap’ or crust forming on the top of the compost (something container plants can suffer due to the artificial nature of their watering).
What to plant with Amelanchier
The blooming of amelanchiers corresponds perfectly with late spring flowers such as snakeshead fritillary, tulip, and pulmonaria, which look exquisite nestled on the ground beneath delicate trees and shrubs.
Alternatively, you may wish to use amelanchier as part of a powerful autumn flush in the garden, alongside other fiery foliage such as that of acer, liquidambar, ceratostigma, and parthenocissus.
If you would like any further planting ideas or growing advice for your amelanchier, please contact our friendly and knowledgeable Customer Care Team - we will be more than happy to help you.
How to care for Amelanchier
Pruning and Deadheading
Amelanchier require little to no pruning, other than the occasional removal of dead, diseased, damaged, or badly placed growth in late winter.
Watering
Water until established (which generally means the first growing season), after which amelanchier tends to be self-sufficient.
Container-grown amelanchier will need to be watered and fed frequently throughout the growing season.
Cold Protection
Amelanchier is as hardy as it gets, and able to withstand a UK winter without the need for additional protection.
Pests and Diseases
Amelanchier is largely problem-free, although can occasionally fall prey to fireblight. Affecting only members of the rose family, this bacterial disease kills new shoots and can give plants the appearance of having been scorched by fire. Affected growth should be pruned off and destroyed, with pruning tools disinfected between each cut.
How to propagate Amelanchier
Amelanchier can be propagated by cuttings taken during summer.
- Find non-flowered shoots 5-10cm long and snip off the plant.
- Put them in a plastic bag straight away to prevent drying out.
- Fill a container with a compost mix which is at least 50% perlite (or if you prefer, as we do, 100% perlite).
- Trim the end of the cutting to just below a node (point at which leaves grow).
- Remove the lowest third of leaves.
- If the remaining leaves are large, cut them in half with a sharp knife (to reduce water lost through transpiration).
- Insert the cuttings into the compost and water lightly. Several cuttings can be put in the same container if there is enough space to do this without them touching.
- Place in a greenhouse or propagating unit if you have one or covered with a plastic bag on a windowsill if not (out of direct sunlight).
- Keep the cuttings misted and occasionally watered until they root. You will know this has happened when roots emerge out of the bottom of the container.
- Gently remove rooted cuttings and pot them into individual pots. Grow on in a cool yet frost-free environment such as an unheated conservatory, greenhouse, or cold frame, until they are large enough to be planted out.
Common questions about Amelanchier
- How fast does amelanchier grow?
Amelanchier has a relatively quick growth rate, tending to put on 30-40cm each year. - Can you grow amelanchier in a pot?
Yes, you can, though as with all trees and shrubs, amelanchier grown in this way will remain smaller than those grown in the ground and require regular feeding and watering. See ‘How to plant amelanchier’ and ‘How to care for amelanchier’ for more details. - Will amelanchier grow in chalky soil?
Amelanchiers tend not to do well on chalky soil. If this is what you have, consider growing yours in a container or choosing a more well-suited alternative such as crab apple or flowering cherry. - When can I prune amelanchier?
Amelanchier requires little pruning, though any necessary is best done during winter dormancy. See the ‘Pruning and Deadheading’ section above for more information. - How tall do amelanchier grow?
The varieties offered by Hayloft range from a 2.5m shrub to an 8m tree, with plenty in between. Check individual descriptions for more details.