


How to grow Cyrtomium
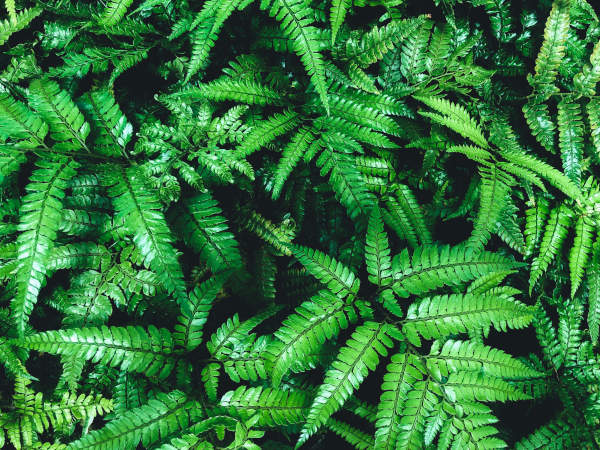
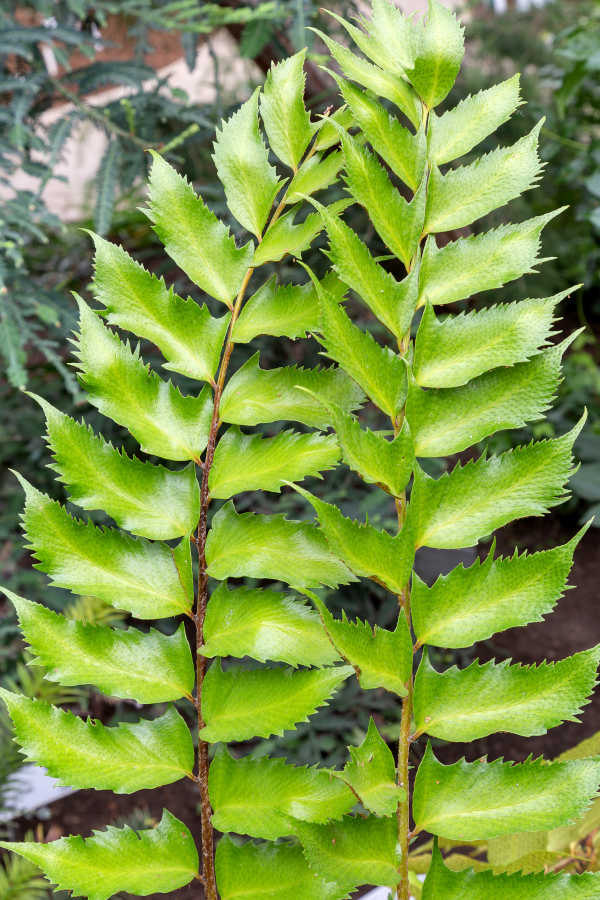
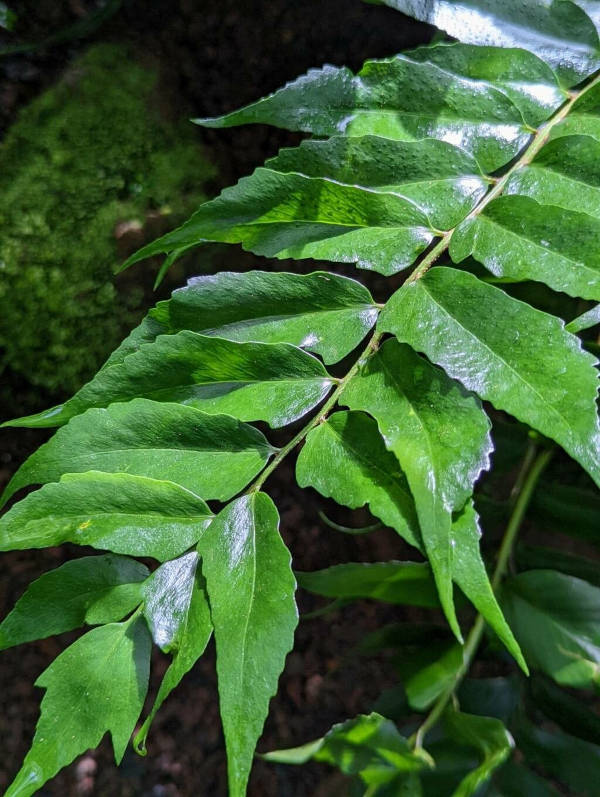
Also known as the holly fern, cyrtomium is a striking thick, leathery-leaved fern from Asia. It is popular for its undemanding, versatile nature and is a favourite for shady spots both in the garden and inside the home. It gets its common name from the angular, holly-like shape of its leaflets held on arching fronds, setting it apart from the feathery texture of many other ferns.
Note that although most species are evergreen, they may become deciduous in our chillier UK climate.
Zantedeschia is a genus of flowering plants from the family Araceae and is native to southern Africa. With a rich history dating back to the Ancient Romans, these deciduous or semi-evergreen perennials have been used as a symbol of celebration. Zantedeschia was Named after Professor Giovanni Zantedeschia, an Italian botanist.
There are two main forms of Zantedeschia: hardy and tender. Hardy forms of the plant can be grown outdoors, enjoy moist soil and full sun or partially shaded conditions - these are known as Arum lilies. Tender forms of Zantedeschia prefer being grown in containers or pots and should be brought inside over the winter - these are known as Calla lilies.
With tuberous flora in all colours from whites, yellows and oranges to deep reds and purples, Zantedeschias are not to be overlooked in any garden, as long as they have sufficient sunlight to grow in.
Ready to learn more about growing Zantedeschia? Read on for all there is to know...

Key Information
Soil pH

Position
Hardiness

Where & when to plant Cyrtomium
Position - Full to partial shade is best. Cyrtomium prefers to be out of the midday sun, however will tolerate this with frequent watering.
Soil - Outdoors, humus-rich, slightly acidic woodland soil is the ideal; moist yet well-draining.
Indoors, best results come from potting into the following mix:
One part each of loam, medium grade bark, and charcoal; two parts sharp sand; three parts coarse leaf mould.
Hardiness - Usually half-hardy, rated H3. This means a minimum temperature of between 1 and -5°C.
One, unusually hardy species is the exception. Cyrtomium devexiscapulae is rated H5, meaning it can withstand temperatures dropping to between -10 and -15°C. See ‘Cold Protection’ section below for more information.
Outdoors, cyrtomium is best planted in spring to allow it a growing seasons worth of settling in before being faced with a UK winter. The hardy C. devexiscapulae can also cope with an autumn planting, though this is best avoided in heavy, wet soils or chilly frost pockets.
Cyrtomium is well suited to a shady border or rock garden. In frost-prone areas, plant half-hardy species in the shelter of a rock or wall and protect during winter as below. It will also do better in a container than most ferns, and is a useful plant for adding greenery and interest to shady patios and balconies.
As a houseplant, cyrtomium is best potted up in spring. Choose a spot for it in bright, indirect light. Although this may sound counterintuitive, it simply means not in the direct glare of the hottest midday sun, and can be achieved by setting the plant back slightly from a south facing window, putting it on an east or west facing windowsill, or in a sunny spot with some form of light shading (net curtain, adjustable blind etc.).
How to plant Cyrtomium
- For planting in the garden, dig the soil area removing any large stones and weeds and breaking up any lumps. Mix in some organic matter such as manure or garden compost, or, even better if you have it, leaf mould. Rake level and firm with your heels. Rake level again.
- Water plants well and allow to drain before planting.
- Dig a hole twice the size of the root-ball.
- Place the plant in the hole, ensuring the top of the root ball sits level with the surface of the soil. Too low and the plant may rot, too high and the roots can dry out.
- Backfill with soil and firm in gently with your foot.
- Soak well with water.
- Mulch around the base with well-rotted organic matter.
- For planting in containers, first choose an appropriately sized pot. The best practice is to start just a few centimetres larger than the rootball and increase in size every few years. Always ensure there are plenty of drainage holes in the bottom.
- If possible, use the compost mix suggested above, or alternatively a good quality loam-based compost with slow-release feed mixed in.
- Start by partially filling the pot with compost; enough so that when placed on it the upper surface of the root ball is about 3cm lower than the top of the pot.
- Fill around the plant with compost, firming down with your fingers then adding a little more so it is held tight.
- Pick up the container (if you can!) and lightly tap on the potting bench or ground a few times to help further settle the compost around the plant.
- Soak well with water.
- A mulch with horticultural grit will look attractive and help to prevent a ‘cap’ or crust forming on the top of the compost (something container plants can suffer due to the artificial nature of their watering).
What to plant with Cyrtomium
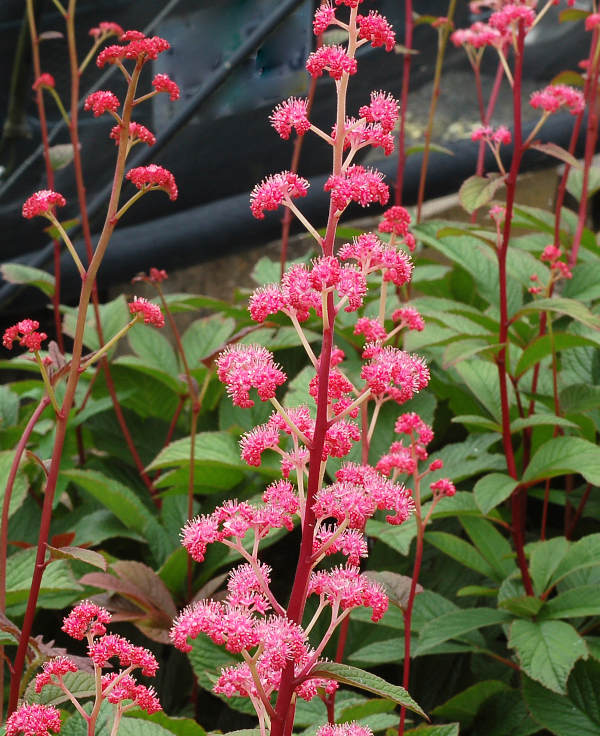
In the garden, cyrtomium is a good companion for hostas and other bold-leaved shade perennials such as asarum and rodgersia.
Indoors, pair with colocasia and adiantum to create a lush, indoor jungle effect.

How to care for Cyrtomium
Pruning and Deadheading
No pruning is required for this evergreen fern, though removing tatty, old fronds in spring keeps it looking neat and fresh.
Watering
Cyrtomium enjoys moist conditions and so, when grown outside, benefits from a good watering in on planting and then regular soakings until established. After this it should need watering only in hot, dry conditions. Allowing the top few centimetres to dry out between soakings helps avoid overwatering. To check this, wiggle your finger down into the soil until you hit a bit that feels cool and damp.
Grown in a container, cyrtomium can be watered freely throughout the growing season. Be aware that in hot weather, containers may need watering more often than you might think (particularly smaller containers which can dry out very quickly). As growth slows in autumn reduce watering to the bare minimum, i.e., just enough to prevent the compost drying out completely.
Feeding
On healthy, fertile soil, a mulch of well-rotted organic matter (i.e., a layer of leaf mould, manure, or garden compost applied to the soil around the plant) should provide enough nutrients for your cyrtomium. This has the added benefit of suppressing weeds and locking in moisture. Mulch when planting, and then again each spring.
If you garden on poor soil or your cyrtomium looks in need of a boost, applying a general-purpose granular feed to the surface of the soil and lightly working in can reap benefits. This is known as a top dress and should be done when you’re mulching in spring – first apply the feed, then cover with the mulch.
Container-grown plants are different as they rely solely on the gardener for nutrition. Get off to a flying start by using either the compost mix suggested above (‘Key Information’), or a good quality loam-based compost with slow-release granules mixed in. These generally provide nutrients for around 6 to 8 weeks, after which you’ll need to apply a diluted liquid feed once a fortnight until the end of the growing season (i.e., September-ish).
Remember to repot your cyrtomium every few years into a slightly larger pot using fresh compost. In the intervening years, it’s worth removing the top few centimetres of compost each spring and replacing with fresh.
Cold Protection
For best results, plant half-hardy species in a sheltered spot and cover with a protective mulch of straw over winter. Cyrtomium tends to be early into growth (with new fronds often emerging in April), and therefore at risk of frost damage. Having said this, we’ve found it to be root hardy, meaning damaged growth is usually replaced within a few weeks. It’s still a good idea to protect it if you can though!
Cyrtomium grown in a container is best moved to a cool, frost-free environment over winter, such as an unheated greenhouse or coldframe. Failing this, put it in a sheltered spot such as up against a south-facing wall, and wrap the pot in hessian, horticultural fleece, or bubble wrap.
Pests and Diseases
Cyrtomium is considered trouble free.
How to propagate Cyrtomium
Cyrtomium can be prolific when it comes to self-sowing, and after a growing season or two you will often see new plants dotted throughout the surrounding area (particularly in areas of moss). Because of this, propagation is rarely required, however if it is, division of the creeping rhizomes is best:
- In autumn or very early spring, sever a rhizome from the parent plant.
- Cut into lengths 5-7.5cm long, ensuring each section has some roots and at least one growing point (bud).
- Plant each section individually into a seed tray or 9cm pot filled with a well-draining mix. Make sure it is at roughly the same depth as it was previously – planting too deep can cause rotting.
- Water lightly and place in a frost-free environment such as a greenhouse or sunny windowsill.
- Grow on in this spot until large enough to be planted or potted into an eventual location, always keeping the compost moist yet not soggy.
* Many plants carry Plant Breeders Rights and cannot be propagated for commercial purposes.
Common Cyrtomium questions
Is cyrtomium easy to grow?
This is one of the best ferns to grow in a shady spot or in the home. It asks for very little in the way of care and will adapt to a wide range of conditions. Many other ferns require humidity when grown as houseplants, however cyrtomium will go happily without.
Can I grow cyrtomium if my garden is prone to heavy frosts?
Go for the unusually hardy species devexiscapulae which can bear temperatures as low as -15°C. Try to give it a spot out of cold, drying winds and don’t be surprised if it drops its fronds during winter.
Is cyrtomium deer resistant?
Its tough, leathery fronds are unpalatable to deer, making this a good choice for rural gardens.